30.9.18

Decoupaged Desk Organiser with Foamiran Roses

Decoupaged Desk Organiser
Hi friends...happy to share a special project I made for my craft-room ...a decoupaged desk organiser. This is a mammoth desk organiser and has place to hold a lot of my crafty supplies but truth be told I just feel like looking at it and not using it at all...it turned out too pretty to use!!!
Decoupaged Desk Organiser
This is the MDF organiser I got from TCES... I love the quality of Rakhi's products and this is the 2nd one I got from her...you can see my first project here : Ocean Themed Shadowbox Desk Organizer.
MDF Desk Organiser from TCES
This organiser is pretty huge measuring 16 x 11 x 10 inches and  made of thick sheets of MDF so it is pretty sturdy. It was quite easy to decoupage too as it comes already smooth and well sanded  thus saving a lot of time  when decoupaging and it is easy to get a  beautiful finish.
Desk Organiser
I chose to use Graphic 45 once again....somehow Graphic 45 papers are my go to papers for large projects and those really special ones and the themes are so fabulous and it is also easy to coordinate the papers!
Desk Organiser
After a coat of gesso , decoupaged  the organiser using Graphic 45 papers from 2 stacks : Portrait of a Lady and  Portrait of a Lady Patterns and Solids.
Desk Organiser

Used rice papers from Stamperia to add the lovely roses and petal on the draws. Though rice paper is expensive it  is so much easier than decoupaging with napkins.
Desk Organiser
I used Folk Art paints and Distress Inks  to change  the  white around the roses to a cream shade with a peach/pink tinge.
Decoupaged Desk Organiser
The above picture is how it looks without the roses and is actually pretty sober and functional but I just couldnt resist making matching foamiran roses and rosebuds with my new Graphic 45 flower dies.
Handmade Foamiran Roses
I used the large die to make the big roses and the medium one to make the rose buds...the shape was just perfect that I didnt have to even heat the foamiran !
Foamiran Flowers with Graphic 45
To get the exact shade of peach to match the papers I used 2 colours of artists oil pastels to colour cream foamiran.
Handmade Foamiran Roses
The foliage around the flowers was also made using Graphic 45 papers...I just inked it a bit using Shabby Shutters Distress Ink for a perfect match.
Handmade Foamiran Roses
The little white filler flowers were also made with foam but this time I did heat the flowers for a second or two to help shape them.
Handmade Foamiran Roses
The roses were given a sprinkle of "sparkling dust" for a subtle shimmer!
Handmade Foamiran Roses
The little bird cage is a chipboard piece mounted on a clay base and dressed up with lace and a rosebud.
Handmade Foamiran Roses
The images from the Graphic 45 "Portrait of a Lady" are so lovely I could stare at them all day!
Handmade Foamiran Roses
On the "shelf" two of the floral arrangements have roses and foliage attached to a shell so that I can move them away when I want.
Decoupaged Desk Organiser
I am so glad I could use the beautiful rose pattern paper on the sides...I had been hoarding it for a special project.


Handmade Foamiran Roses
And here are all the foamiran flowers I used to decorate this desk organiser.
Handmade Foamiran Roses
I hope you liked my project .

Supplies : MDF Desk Organiser- from TCES[ The Elements Craft Studio]
Most of the other supplies are from Crafters Corner
Dies :  Roses and Rosebuds: Graphic 45 Large Tag, ATC Tag and Flower Dies. Flower Calyx : Cheery Lynn  Large Rose.Filler flowers : Elizabeth Craft Designs 728 Bunch of Flowers,Leaves : Graphic 45 Large Tag, ATC Tag and Flower Dies,Heartfelt creations Classic Leaf Die,Heartfelt creations  Classic Rose vines die,Craft Passion Sprig 3,Marianne Creatables Tiny's Lily CR1308,Cheery Lynn  Rose Leaf Strip
Misc : Doll Charm, Sparkling Dust, Feather metal bookmark, Pollen, Floral tape
Papers : Portrait of a Lady and  Portrait of a Lady Patterns and Solids.

25.9.18

Cascading Card

Cascading Card
Hi friends sharing another  Pop Up Card in a cascading design similar to the Snowflake Cascading card I had shared earlier. This time I modified the snowflakes by chopping off bits and added a snowglobe. This special card is  my DT project for the Rudolph Days Challenge .
Cascading Card
I created the design on the snowglobe die cut by stamping and heat embossing snowflakes and falling stars and inking with Distress Inks  . Added a pair of die cut deer and poinsettias and finished off by adding  " XMAS 2018"
Snowglobe Card
I am in love with the teal blue and the dangling hearts! In the side view below you can see the cascade and the best thing about this card design is it folds flat for mailing!
Here is the Tutorial link to make the Cascading Card : Cascading Card Tutorial 
Cascading Card
Dont forget to join us at the Rudolph Days Challenge....Maureen always has some fabulous prizes you can win.

Supplies : Dies :  Supplies: Crealies Dies :Cardzz No 08 ,Set of 3 No 52,Duo Dies No 52,Partz No 29,X-tra No 122,X-tra No 123,Silhouetzz No 4,Text Dies No 115
Stamps : Crealies Bits and Pieces No 131,Bits and Pieces No 132,Bits and Pieces No 134

22.9.18

Snowglobe Shaker Card

Snow-globe Shaker Card
 Hi friends...I am in love with the Snow-globe die from Crealies and just couldn't resist sharing another creation with it.
This card which can also be used as an ornament on your tree was made using 2 snowglobe die cuts.
Snowglobe Shaker
One one snowglobe I stamped and water-colored the Crealies candles and poinsettia image using Zig Watercolor Brush Pens .
Snowglobe Shaker Ornament
 Diecut  a snowglobe in double sided adhesive foam and diecut a window inside it. Chop off bits on the borders of the foam for easy placement.  Place your shaker elements and stick on a acetate sheet. Top off with a snowglobe + window cut on glittery white card stock .
Snowglobe Shaker Card
 I die cut some candles [also from Crealies] and added it behind the poinsettia so that there were similar elements both inside and outside the shaker! The let it snow is stamped on a candle.
Snowglobe Shaker Card
I hope you like my Snow globe card in traditional Christmas Colors.

Supplies :  Crealies Dies:Cardzz No 08,Set of 3 No 52,Duo Dies No 52,Partz No 29,Partz No 30,Partz No 33
Crealies Stamps:Mounted Rubber Stamps No 12,Text and Co No.3
Paper: Ivorysheet, Canson Montval Watercoloring paper
Ink: Versafine, Versamark, 
Ranger Gold Embossing Powder
Coloring Media : Zig Watercolor Brush Pens , Distress Inks  

18.9.18

Cascading Pop Up Card

Cascading Snowflakes Card
Hi friends...sharing a special 3 D Interactive Pop Up Card....in a Cascading design! Cascading cards used to be very popular at one time and though they look very complicated they are actually wonderful cards to make when you want that to make an extra special card! The design is just a fusion between accordions and slots.
Cascading Snowflakes Card
         Here is the Tutorial link : Cascading Card Tutorial  . I made the base using my original Tutorial and  then used the border die from Crealies Snowglobe set to cut a wavy border on the top part to create a snowy landscape for the snowflakes.         
The die cut snowflakes are made to pop up and swing by mounting them on acetate sheets and attaching them to the card base Finished off the card with a trio of poinsettias!
This Winter/Christmas Celebration card opens out to display and can fold flat for mailing or storage.

Ink : Distress Inks  Tumbled Glass


11.9.18

Triple Craft Punch Review and Project Ideas

Triple Craft Punch Projects

           Hi friends, when I first started crafting I fell in love with Craft Punches and so  I was especially  thrilled when Shalini  launched Craft Punches under her brand Dress My Craft 
In this post I will demo the Dress My Craft Triple Punches and show you how versatile they are with a couple of projects.
Special Features of the Triple Punches 
  • Size : They are pretty large and sturdy Punches and can punch  paper widths of upto 2.5 inches .No limit to the length of paper you can punch!
  • Mechanism :All 3 Triple Punches act by the  "Lever mechanism" which is personally my most favorite punch mechanism as not only is it easier to punch paper using lever punches but it also gives cleaner cuts
  • Can hold in hand and punch! Because of the levering mechanism you can hold the punch and punch with your hand instead of having to always set it on a surface to punch.This is an advantage when you want to use the negatives of the punch-outs as shown in my video.
  • Layering Punches- The base of the 3 punches have markings of 1.5, 2 and 2.5 inches on wedges to fit papers of these 3 widths-  this makes layering of your punched out tags and banners super easy. 
  • Wedged Paper feeder-The wedges on the paper feeder base are an especially useful feature as if you cut your paper to size and feed it into a wedge say 1.5 or 2 or 2.5 inches...you can easily align the edges of your paper so that you dont get a wonky or crooked tag/banner.

  • Another advantage of the  wedges is it allows you to easily align paper widths such as 1 ¾  or 2 ¼  to make layering quicker and easier.
  • Nonskid Base : The base has built in nonskid discs which is especially handy when you are working with big punches such as these.
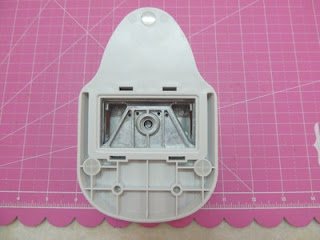
Craft Punch Base
  • Heavy duty Punch : The punches can easily punch papers of 300g and it even smoothly punched ivory sheets!
  • Punches thin paper too- now you may be wondering why am I listing this as an advantage of these Dress My Craft punches...well surprisingly some heavy duty punches  give jagged edges with thin paper as they are meant to be used with card-stock! 
  • Cut pieces are useful too! I  am sure there are many of you who like  to waste as little paper as is practically possible when you craft. I love it when I can creatively use the negatives and little bits which are left  with the main punched design . When you scroll down you'll see how easy it is to create chevrons and beautiful patterns with the negative bits of the triple punch designs!
Ok now let me show you some project ideas to show the versatility of the Triple punch designs

Sharing some quick and easy to make Handmade Gift Ideas
  1. Layered Bookmarks
  2. Mini Album/Box Closure Mechanism
  3. Business/ID Card Holder Box
  4. Accordion Box
  5. Organiser/Gift Basket
Bookmarks
When I got the triple punches a few days back I was frantically making notepad holders as Teacher's Day gifts and these layering punches were quite  handy to quickly make some gorgeous matching bookmarks for my daughter's teachers. 


I used the Rounded Tag Punch to create the layered bookmarks. It is very easy to create layers quickly using the wedges and markings.
Notepad Holder and Bookmark
Crafty Tip
If you are using the increments of 0.5 inches width strips....increase your paper strips by 1/4th inch only to get the perfect margin.I played around with the measurements of the strips to get borders of different widths.
Craft Punch Bookmarks

One big time saver with this tag punch is the hole which also punches perfectly with the rounded top shape. You just have to add an eyelet and a thread to finish the  bookmarks!
Love how the punches work beautifully with different papers.
 
 Box / Mini Album Closure

The shape of the Rounded Tag is just perfect to make a stylish closure mechanism!


I created a acetate window box from this project : Foamiran Flowers Hanging Decoration and made a secure closure using the Rounded Tag punch.

 You just have to add an eyelet and thread a ribbon/twine to create the closure.

ID Card/Business Card Holder


These cute Mini Flip top boxes are designed to hold ID/Business Cards. They are made from  10 ¼  x 4 inch pieces of card-stock using the rounded tag punch.

Accordion Boxes

  This box looks similar to the boxes shown above but is much easier to make and is quite roomier too.

 It is an accordion box which is ½  inch thick and measures 3 ¾ x 2 ½ inches  .You can make it in different lengths to hold tags, I love you notes, small photographs etc.

I designed them to hold Membership cards/ID cards/Visiting Cards.


Because of the magnetic closure it is not advisable to use it with Credit Cards.


 The base is made from a single strip of cardtock measuring 2 ½  x 10 ¼  inches

 And the accordions on the sides help it to expand. And they also help partition the inside of the holder to keep the cards separately for easy access.

Chevron Pattern
Here are the backsides of the boxes showing how you can use the negatives of the punch-outs to create chevron patterns. They would look beautiful in cards too.

Here is a short  video Tutorial to make the ID card holders


 Organizer Baskets/ Gift Basket

Because the Tag Punch can punch through really thick paper...it is fabulous to make Mini Organisers or Gift baskets. These cute Organisers  have wooden dowel sticks threaded through eyelets in the tags and you can carry them around by holding the rods.


 You can make them as long as you want. These are 4 inches long and 2 inches wide and are perfect to hold tiny bottles of nail polish [above]  or crafting supplies such as Alcohol Inks [below]!

I hope you liked the project ideas and before I bid adieu don't forget to check out this post on the  Use and Care of your CraftPunches 

Supplies from Crafters Corner
Papers : Dress My Craft Floral Symphony, Dress My Craft Hydrangea Lawns, Dress My Craft Pastel Pink Textured Cardstock, K and Company Tim Coffey Cottage Garden Specialty Paper, Acetate

Related Posts Plugin for WordPress, Blogger...