Thank you so much for all the supportive comments on my daughter's video tutorial on creating mini books.
Sharing more mini books we had made to gift my daughter's teachers.
We created the cover and pages of the mini book first as demoed in this Mini Book Tutorial
Mini Book with texture past whipped spackle
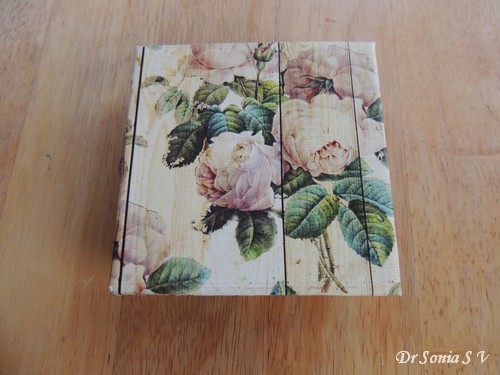
I used a Memory Box stencil and texturing media Whipped spackle to create a subtle texture on the cover of the book [ gorgeous papers : Ornate Annie from Bob n Betty].
Added a few of my favorite heat embossed flowers[ Heartfelt creations Sun kissed fleur ] and a few scattered pearls using my favorite new toy the Crystal Katana !
Mini Book Tutorial
I wanted the gorgeous paper to be visible so kept the embellishments minimal with just a pearl mat, a few chipboard hearts and a fuzzy cut butterfly.
Mini Book Tutorial
The hinge of this particular mini book has 2 thin ribbons instead of one broad ribbon I had shown in the Mini Book Tutorial shared earlier.
Mini Book Tutorial
The photo above shows the inside of the book with the pages all fanned out[ papers are from Indian brand Papericious and is from the stack Bird Songs]
In case you missed my daughter's video tutorial on how to make the pages of the Mini Book here it is once again
How to make pockets in your mini book
You can create 7 pockets in your mini book to hold little tags or other knick knacks. Materials required to make a Mini Book with Pockets and Tags
Good Adhesive- use liquid glue or thin red tacky tape.
Circular Punch - if you don't have one don't despair - simply hand-cut a wedge shaped opening instead of the semicircle you can make with a punch
Punches or dies to make tags - again of you don't have the fancy dies to make tags- simple hand cut thick paper into a size that will easily fit into your pockets
Follow the video tutorial shown above or the pictorial shared in my earlier post : Mini Book Tutorial to make an accordion folded mini book
Mini Book Tutorial
In the picture below the top red arrow shows where you can create your first pocket. It will fall between the 2nd and 3rd pages and you can use it to make a pocket that will open up.
The bottom red arrow shows where you can create your 2nd pocket and it falls between the 4th and 5th pages of your mini book and you can use it to make a pocket that will open towards the side.
Mini Book Tutorial
The picture below shows the 2nd and 3rd pages and how to apply adhesive[I have used thin red tacky tape here] so that you can create a pocket that opens up.
Mini Book Tutorial
I like using red tacky tape as it gives instant adhesion and the adhesion area is predictable unlike wet glue which can seep and involves a bit of waiting and mess!The red arrow in the picture below shows the first pocket created once you adhere the 2nd and 3rd pages along its lower and back borders.
Mini Book Tutorial
The folds of the mini book are such that the pockets will alternate opening up and to the side.
In the picture below the red arrow shows the site where you can create the 2nd pocket- it falls between pages 4 and 5 can be created to open to the side.
Mini Book Tutorial
Apply adhesive as shown in the picture below. Apply wet adhesive or red tacky tape on 2 sides so that the pocket opens to the side.
Mini Book Tutorial
Once you adhere the pages here is how your mini book will look- the first pocket opening up[ [top red arrow] and the 2nd pocket opening towards the side[ side red arrow]
Mini Book Tutorial
Your next pocket [marked as 3rd pocket] will open up and apply adhesive between the pages[ will be between pages 6 and 7] like you did to create the first pocket.
Mini Book Tutorial
Once you have created all the pockets in alternate up and side opening fashion here is how your mini book will look like. The red arrows denote pockets that open up and the blue arrows denote pockets that open to the side.
Mini Book Tutorial
For easy removal of tags which you may want to insert inside the pockets create hand cut wedges or punched semicircles on the pages which form the pockets.
Mini Book Tutorial
Tip : I used to get confused on where to apply adhesive to create the pockets. If you too are getting confused--simply mark with a pencil the sides where you need to put the adhesive ...this makes it quicker and avoids confusion!
Sharing the last of the mini books we gifted my daughter's teachers.
Mini Book Tutorial
I used the pretty Floral logs from Bob n Betty [an Indian Pattern Paper designer company] and added a parchment butterfly heat embossed in gold
Mini Book Cover
Heat embossed my favorite Heartfelt creations Botanical Wings in copper on parchment paper and added store bought paper flowers to the centers. The leaves [from Winnie and Walter In Bloom Elsa's Flora Stamp Set]were heat embossed in gold and colored with Distress Inks.
Mini Book Tutorial
Here is how the book looks from above with its pockets and tags.
Mini Book Tutorial
And here is the complete set of mini books we gifted to my daughter's 4th standard teachers.
Handmade Mini Books
I hope you enjoyed seeing the mini books and hope the tutorial to create the pockets will be useful.
Absolutely beautiful mini books! Beautifully embellished and wonderful paper choice. Thank you for your tutorial, you've really made it look doable (even for me!) Debra x
All amazing albums, love bouth one on the right side uper and lower, they are my favorite ones, so amazing!! Definetly will make ona thise month and know just the right perso to give :) ♥Hugs Valentina♥
Oh wow, all of the minis look absolutely stunning!! The papers are gorgeous!! You decorated each one so perfectly!! And your tutorial is fabulous, too!! I want to make one now!! Love, love these my friend!! Amazing as always!! Have a great day!! Big hugs :)
Beautiful mini books, Sonia!! Lovely papers! A wonderful tutorial by Prisha!! So happy to see her confident in front of the camera and do it with a cute smile!! -Berina Moxie Craftie
Thank you thank you thank you so much Sonia! I love your booklist and hope I can make one soon ! Gorgeousness! Wonderful in every way - I really really REALLY love this! Can you tell? Thanks for the fabulous tutorial! Hugs, de
Dr Sonia, you and your daughter have created such beautiful gifts. The papers you have used are just wonderful and the embellishments just the right amount.
Dr Sonia, Decided to wait and show the girls next month how to make the booklets because I wanted to see how you created the tags and I'm glad I did. Also I wanted to ask you if you had any trouble after folding the paper with the edges not quite matching? I tried making one of the booklets and had problems with the edges matching up. These are wonderful gifts to give to the teaches or to anyone. Thank you so much for sharing this tutorial with everyone.
I am so glad the Mini Book Tutorial posts are helpful to you and oh yes unless you really obsess about the folds and cuts they will not match but just snip off the irritating edges and use Distress Inks on the white looking edges so it doesnt really matter in the end. Now that I have made a few I manage to get the folds perfect
Wow Dr Sonia.....what a beautiful gift for your daughters teachers. Thank you so much for always sharing detailed tutorials. Love the pretty papers and gorgeous flowers. Have a great week!
Very pretty, all of them . One of my March entries made one of these and linked to a video tutorial on how to make it. Last month I made about 5 of these they are so fun. I am glad you liked making them to. Great written tutorial. Have a blessed day DIANA L.
Berina I had guests at home so was rather busy now things are settling down to usual routine so will be back to blogging soon...so sweet of you to visit me!


very pretty...the teachers wud be happy
ReplyDeleteBeautiful creations and luck teachers :)
ReplyDeleteAmazing project!
ReplyDeleteAbsolutely beautiful mini books! Beautifully embellished and wonderful paper choice. Thank you for your tutorial, you've really made it look doable (even for me!) Debra x
ReplyDeleteAll amazing albums, love bouth one on the right side uper and lower, they are my favorite ones, so amazing!!
ReplyDeleteDefinetly will make ona thise month and know just the right perso to give :)
♥Hugs Valentina♥
Not one but five fabulous mini books Sonia, each one a delight in it's own way.
ReplyDeleteB x
Fabulous tutorial as ever. Love how they turned out. Cara x
ReplyDeleteAll the mini books are so beautiful....Thanks for tutorial...
ReplyDeletenice work on your tutorial - tfs
ReplyDeleteAbsolutely STUNNING! I love how you put these together!!!!!!!!!!!!!!!!!!!!!!!
ReplyDeleteReally lovely project.
ReplyDeleteSuch a gorgeous mini accordion book!! Love all of the special details you've put into this! :) HUGS
ReplyDeleteOh wow, all of the minis look absolutely stunning!! The papers are gorgeous!! You decorated each one so perfectly!! And your tutorial is fabulous, too!! I want to make one now!! Love, love these my friend!! Amazing as always!! Have a great day!! Big hugs :)
ReplyDeleteLisa
A Mermaid's Crafts
Beautiful mini books, Sonia!! Lovely papers! A wonderful tutorial by Prisha!! So happy to see her confident in front of the camera and do it with a cute smile!!
ReplyDelete-Berina
Moxie Craftie
Awesome..thanks for sharing the tutorial. . :)
ReplyDeleteI'm in love with these minibooks, such amazing papers and embellishments! And great textures!
ReplyDeleteGorgeous mini books. Thanks for the tutorials. hugs, Teresa
ReplyDeleteStunning collections Sonia, wow!! I love the touches of gold on the flowers, how wonderfully elegant! hugs :)
ReplyDeleteAll the mini books are so beautiful love them all...Thanks for the tutorial..Awesome
ReplyDeleteVery beautiful!
ReplyDeleteThank you thank you thank you so much Sonia! I love your booklist and hope I can make one soon ! Gorgeousness! Wonderful in every way - I really really REALLY love this! Can you tell? Thanks for the fabulous tutorial! Hugs, de
ReplyDeleteI meant booklet- sorry about the auto correct.
DeleteDr Sonia, you and your daughter have created such beautiful gifts. The papers you have used are just wonderful and the embellishments just the right amount.
ReplyDeleteBeautiful and memorable gifts. Thanks for the detailed tutorial
ReplyDeleteDr Sonia, Decided to wait and show the girls next month how to make the booklets because I wanted to see how you created the tags and I'm glad I did. Also I wanted to ask you if you had any trouble after folding the paper with the edges not quite matching? I tried making one of the booklets and had problems with the edges matching up. These are wonderful gifts to give to the teaches or to anyone. Thank you so much for sharing this tutorial with everyone.
ReplyDeleteI am so glad the Mini Book Tutorial posts are helpful to you and oh yes unless you really obsess about the folds and cuts they will not match but just snip off the irritating edges and use Distress Inks on the white looking edges so it doesnt really matter in the end. Now that I have made a few I manage to get the folds perfect
DeleteThank you so much. I'm glad it's not just me.
ReplyDeleteWow Dr Sonia.....what a beautiful gift for your daughters teachers. Thank you so much for always sharing detailed tutorials. Love the pretty papers and gorgeous flowers. Have a great week!
ReplyDeleteOh dear, the lucky teachers- these are just gorgeous!!! I am loving all of the details, papers and embellishments!
ReplyDeletewow..that so amazing. creative..thanks for sharing your artickel :-)
ReplyDeleteThese are stunning. Love all the papers and thanks for sharing the fabulous tutorial!
ReplyDeleteThis is simply awesome!!!. Love that you gave us a tutorial as well!!your mini books are gorgeous!! What a very thoughtful teachers gift.
ReplyDeleteVau, kaunista ♥
ReplyDeleteGorgeous and amazing tutorial, thank you for sharing, hugs, Lori m
ReplyDeleteVery pretty, all of them . One of my March entries made one of these and linked to a video tutorial on how to make it. Last month I made about 5 of these they are so fun. I am glad you liked making them to.
ReplyDeleteGreat written tutorial.
Have a blessed day
DIANA L.
DL.ART DESIGN TEAM MEMBER
DL.ART crinkle ribbon
http://dianamlarson.blogspot.com
http://dianamlarson.ctmh.com
Amazing Sonia, each one is a beautiful work of art! What a treasured gift they are going to receive!!
ReplyDeleteYour blog is amazing ,such beautiful work
ReplyDeleteLooking wonderful...
ReplyDeletevery beautiful n innovative idea
ReplyDeletehttp://anuspapercraft.blogspot.com/
Hi Sonia, just checking if you have posted any new posts. Hope everything is good. Take care.
ReplyDeleteBerina I had guests at home so was rather busy now things are settling down to usual routine so will be back to blogging soon...so sweet of you to visit me!
DeleteBentuk undangannya sangat bangus sekali. terimakasih ya :)
ReplyDelete