Showing posts with label Box Tutorial. Show all posts

7.4.23

Rotating Triangular Box Tutorial

Hi friends sharing a special rotating box in the shape of a triangle. I once saw a rotating box in the shape of a cake some years back on Youtube and the idea stuck with me. I couldn't find the video again and so took the idea and worked out my own design.It was not easy and was a trial and error design but I am thrilled with how it turned out!
I made it to show off my Graphic 45 papers. I have used Graphic 45 Portrait of a Lady to make this project which is part of a series of projects I made for my craft room.

I love how Graphic 45 has apt sentiments which resonate so easily with most of us! I have kept decorations minimal on this box as it is going to be an everyday use item and anyway the pretty G45 papers don't require much embellishing!

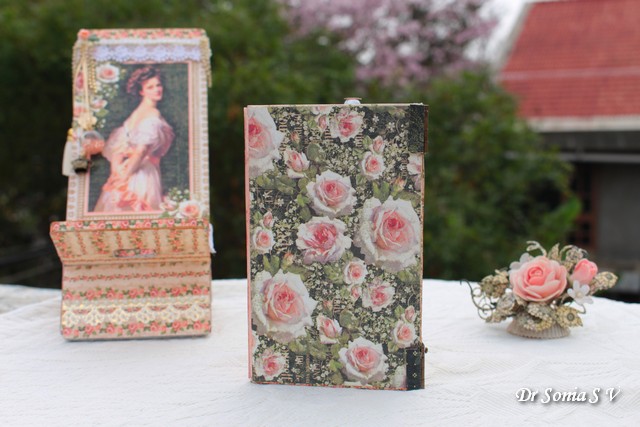
Here is how the top of the box looks...with fussy cut flowers and a pearl adorned with a fussy cut rose.

The box has 3 sides and this is how it looks when opened.

There are 5 chipboard triangular supports and 4 swinging drawers made out of thick cardstock.

I hope you liked this unique box idea. 
Here is the link to the Rotating Box Tutorial 


2.2.20

Slider Box Tutorial


Hi friends I love interactive mechanism and in this post I am sharing an Interactive box....a sliding box along with a matching Pop Up Card and a Post it note holder all made with nesting dies from Crealies  

I used fairy themed papers and add matching handmade foam flowers on the  front of the  box

I used one of my favourite Crealies  dies to make the   simple flowers from foamiran


The lid of the  box is special....it has a slider opening and on pulling up the  slider you can see an image inside!


I kept the  inside fairly simple as I plan to use it as a gift box...you can add cute scenic elements inside if you want to use it as a shadow box.


Tutorial 
Here is a generalized Tutorial to make the  slider mechanism . I am not giving any exact measurements as you can adapt the  techniques to any die in your stash
The sliding mechanism is in the  lid of the  box and is a modified slider card.
Materials
  • Nesting Dies. In this post I have used Crealies  dies : Crea Nest Lies XXL No 96 Ticket.
  • Card stock : thick good quality to make the  base so that you have a sturdy slider
  • Pattern Paper
  • Good adhesive
Make a box of dimensions such that  is smaller than the  largest nesting die you are going to use.
Leave a 1/2 inch flap extra at the  top of the  box on all sides [ see the  picture lower down the post to understand what I mean]

Tape 2 nesting dies together to get a wide frame- my new glass mat was really helpful in getting the  centering right!

Die cut 2 frames from card stock and one frame from pattern paper

I also die cut the  larger of the  die from cardstock and pattern paper to form a an optional base for the  box[ see picture lower down]

Make a slider piece so that its  dimensions are slightly larger than the  inner aperture of the  frame
To allow the  slider to move in and out of the  lid you need to create a pocket in the  lid for it using double sided foam tape or cardstock like I did here. The advantage of using cardstock is that is looks more polished and there is no danger of it becoming unstuck over time which is a risk with foam tape!

The card pieces are as long as the sides of the  box. 
The lower one measures 1 and 1/8 inches and is scored 1/2 inch from either side of its width leaving a 1/8 inch in the  middle as shown above
The side pieces measure 2 inches and are scored at 1/2 inch from either end of the  width and then 1/8 inch from this 1/2 inch score line


 The side pieces are stuck in such a way that the  1/2 inch sides are on the  frame and placed such that the  slider piece can move freely.

The lower one is stuck in such a way that the half inch part is on the  base and the  rest is free as shown below

This is how it will look with the  slider  in situ


Once you are happy with the  sliding ...you can add the top frame lid consisting of pattern paper frame stuck to the  cardstock frame.


Apply glue and stick


This is how you slider lid will look


Apply glue to the  box which you had made with an extra half inch free flap on the  top on all sides as shown


 Stick the box under your slider lid and press firmly


Optionally add another base layer to the  box and decorate as you please

I made a matching card for the  box by layering die cuts.


On the  inside I tried a new type of Pop Up Card design and it turned out super cool!I used the  nesting diecuts to create pop up layers one in front of the  other.


The "live laugh love life" is from a new Crealies  stamp set and is perfect for small cards and tags.

Here is the  side view showing the layered pop up mechanism

 Here is the  backside of the  box and card which is simple to give enough space to write a personal message.

To complete the  gift set, I made a matching shaker  Post- it note holder too.

I love how versatile nesting dies are and I hope you liked these ideas on how to use them in different ways
Linking to  Simon Says Stamp Wednesday Challenge - Anything goes

19.12.19

Birthday Toy Train Tutorial

Birthday Toy Train
Hi crafters...sharing a huge birthday present I made for my little niece who is celebrating her 5th birthday this month. Her favourite colour is pink and so I went really overboard on the  "pinkness" here!!
This project was made exclusively using Crealies  dies. I used the Crealies  train Cardzz die to make the cute train and lots of other dies from Crealies  to add the  fun elements
Birthday Toy Train
    Since I am going to be taking this all the  way to Kerala my hometown where my niece resides I needed the  whole ensemble to safely fit in my suitcase...so I came up with an idea to have the  individual parts fit together with  tiny magnets in the  wheel bars.
So this is like a real toy which you can assemble and then take apart and store! 
Birthday Toy Train
The first wagon 2 wagons had balloons galore for the  birthday girl and this one which is my favourite has floating glittery clouds and the birthday girl's name in matching letters .
Birthday Toy Train
On the  4th wagon I added elements you may see in a typical little girl's birthday : lots of pink ...pink frocks, toy balls, cameras , pink bows and hearts!
Birthday Toy Train
On the last wagon I added something yummy---strawberries!
And more balloons and buttons and a giant 5!!
Birthday Toy Train
Don't you just love those strawberries.
Birthday Toy Train
Ok ...here is how you can make a Toy Train Treat Box/ display for a special occasion.

Make a Shaker Number
The new Crealies number dies in the Cardzz category are really huge and are perfect to make banners and huge decorations. For my toy train I made 2 big number 5 's 
Here is how you can easily make a shaker number.
Die cut your base using the largest shadow number.
Tape the inner 2 numbers together and die cut double sided adhesive foam.
Shaker Number Tutorial 
Stick the number frame cut with the  adhesive foam onto your base.
Shaker Number Tutorial 
Add shaker elements.
Die cut an acetate sheet using the  middle number.


Shaker Number Tutorial 
Stick this onto your adhesive number frame.
Shaker Number Tutorial 

Press well to stick


Shaker Number Tutorial 
Add a frame made using the inner 2 numbers and add it over your shaker
Shaker Number Tutorial 

And you have a quick and easy Shaker number.
Birthday Toy Train


Make Toy Train wagons
Toy Train Tutorial 
If you want to make a sturdy but lightweight toy train you can use foam to give strength your paper train.

For each train wagon/engine 
Die cut 3 pieces [1 in pattern paper, 1 in card stock and 1 in foam- to be sandwiched between pattern paper and cardstock] for the front and 3 pieces for the  back.

To make the  wagon boxes
You can make the boxes from chipboard  or make the  wagons using cardstock like I did for this project
Toy Train Tutorial 

To make one wagon you need just one 18 x 12 cm paper.


Toy Train Tutorial 


Score it on all its edges [ by turning the  paper as you go] at 4 cm from the  edge[ = 1 3 /4 inches]
Toy Train Tutorial 
Once your paper is scored make 4 cuts as shown to enable you to fold your paper into a box.
Toy Train Tutorial 

Snip off a bit of paper to create gluing tabs


Toy Train Tutorial 

It will look like this:


Toy Train Tutorial 

Optionally snip off triangles from the  outer end of your gluing tab as shown below...this is not compulsory...it just gives a neater finish to your gluing
Your paper will look like this now...all ready to fold and glue into a box
Toy Train Tutorial 
Fold all score lines and you will get a shape as shown below
Toy Train Tutorial 
Apply glue to your gluing tabs and glue.Use paper clips to help keep your parts together as your glue dries
Toy Train Tutorial 

My toy train has 5 wagons as the  birthday girl is celebrating her 5th birthday!
Toy Train Tutorial 

Stick the  boxes onto your wagons and your train boxes are ready to add little toys, candy etc
Toy Train Tutorial 
Since the toy train is very big with 5 parts I wanted a mechanism to take apart the pieces and put them back together like a real toy...I made magnetic parts to join the wheels of the train
Toy Train Tutorial  
Cut 3 strips [in cardstock, foam and silver paper] and 2 wheels using the dies in the Train Cardzz set.
Stick the  foam in between the pink cardstock and silver paper...this makes your part sturdy and prevents it from buckling while keeping it lightweight
Toy Train Tutorial 
I made 8 strips to join 5 of my train wagons
Toy Train Tutorial 

You can simply glue the  wheels on to your strips or if you want a really good adhesion use brads. Poke holes on either end of the strips and through the center of your wheel and join the wheel to your strip using the  brads. I added magnets to the  backside of the  strips under the wheel and magnets onto the wagon wheels as you can see in the  toy train individual pieces below


Birthday Toy Train
As a final touch I will be adding photos of the  birthday girl and her family
in each of the wagons and in the  windows!
I hope you like some of the  ideas I have shared in this post
Here are the  supplies used
Crealies Dies:
Related Posts Plugin for WordPress, Blogger...