Showing posts with label Technique tutorial. Show all posts

7.4.23

Rotating Triangular Box Tutorial

Hi friends sharing a special rotating box in the shape of a triangle. I once saw a rotating box in the shape of a cake some years back on Youtube and the idea stuck with me. I couldn't find the video again and so took the idea and worked out my own design.It was not easy and was a trial and error design but I am thrilled with how it turned out!
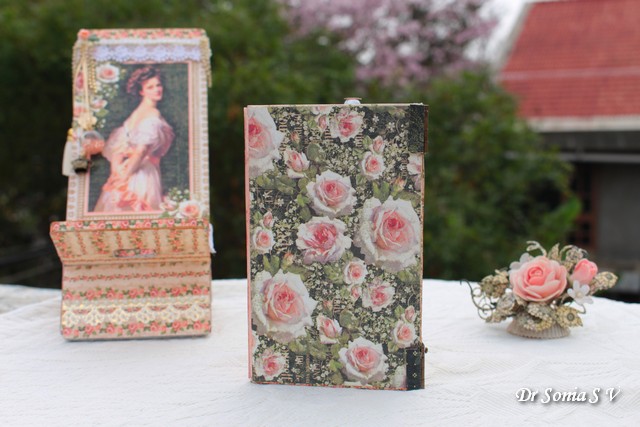
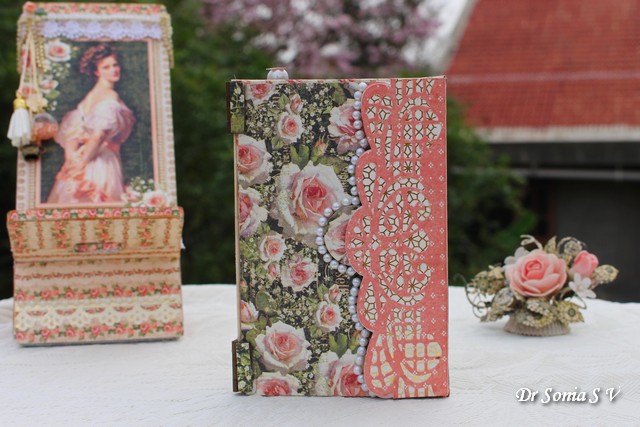
I made it to show off my Graphic 45 papers. I have used Graphic 45 Portrait of a Lady to make this project which is part of a series of projects I made for my craft room.

I love how Graphic 45 has apt sentiments which resonate so easily with most of us! I have kept decorations minimal on this box as it is going to be an everyday use item and anyway the pretty G45 papers don't require much embellishing!

Here is how the top of the box looks...with fussy cut flowers and a pearl adorned with a fussy cut rose.

The box has 3 sides and this is how it looks when opened.

There are 5 chipboard triangular supports and 4 swinging drawers made out of thick cardstock.

I hope you liked this unique box idea. 
Here is the link to the Rotating Box Tutorial 


3.3.20

Turtle Bookmarks Tutorial


Hi friends I am sharing a sweet but functional project which you can gift to a sweet child in your life .I got the  idea of these Turtle Bookmarks from a You tube Channel called Red Ted Art and put a crafty spin on them

You can make these as simplistic as you want or go to town with all kinds of fun media in your stash
Turtle Bookmarks Tutorial 
Start with a 6 inch square green paper...not too thick but not very thin either.
Turtle Bookmarks Tutorial 
Fold it diagonally into a triangle

Turtle Bookmarks Tutorial 
Fold up both the  corners of the  triangle as shown

Turtle Bookmarks Tutorial 
Unfold these folds

Turtle Bookmarks Tutorial 
Now fold down a triangle in the  upper layer as shown

Turtle Bookmarks Tutorial 
Tuck in one corner of your triangle as shown

Turtle Bookmarks Tutorial 
Tuck in the  other corner and your basic bookmark is ready!

Turtle Bookmarks Tutorial 
Optionally round off the  single layer corner as shown below

Turtle Bookmarks Tutorial 
Your turtle's body will be a triangle which you attach atop this bookmark


I used a mosaic stencil and Distress Inks  to create a mottled design for the  body and legs
Turtle Bookmarks Tutorial


Draw freehand and cut legs for your turtle. You don"t have to be super accurate! Use One leg as a template to cut out the  other leg so that the  legs are fairly symmetrical

Place your bookmark on the  page of a book and see what position you want your legs to be before you stick them inside the  turtle's body


Roughly extend a circle to make your turtle head.


Draw a cute face...I used an old Peachy Keen face stamp I had.


Add some blush on your turtle's cheeks and your turtle corner bookmark is ready!

If you are in a crafty mood you can have some more fun when you make your turtle.
Stencil Tutorial 
Apply Crackle paint through the  stencil as I did here:
Stencil Tutorial 
It dries to give a beautiful design which is perfect for your turtle's shell!
Stencil Tutorial 

Turtle Bookmarks Tutorial 
That subtle crackle is so delightful to look at!
Turtle Bookmarks Tutorial 
You can also use different shades of brown to make the  shell


But it does make the  turtle look more serious!! Hehe

Turtle Bookmark
I achieved another lovely look by using clear Ultra thick embossing powder
Turtle Bookmarks Tutorial 
It gives a glossy wet look which is fabulous !
Turtle Bookmarks Tutorial 

Turtle Bookmarks Tutorial 
You can also use all kinds of mixed media pastes to create fun shell textures.
I hope you liked this simple Tutorial and ideas to create fun Corner Turtle Bookmarks
Supplies : Carabelle Studio Vitrail Stencil from Crafters Corner
Linking to 
2 Crafty Critter Crazies Challenge 36

25.11.19

Flip and Fold Folio Tutorial

Flip and Fold Folio
Hi crafters. I know you will agree with me when I say it feels good to be able to stretch our supplies isn't it ! I created this folio / folder  by tweaking the  die-cut shapes from a Crealies  tag die [Crealies Big Labelzz and Tagzz No.16 ]

Flip and Fold Folio
I made the dimensional paper flowers using Crealies  dies and really thick card stock so that they won't be squished when the  folio is handled!The leaves are holly leaves inked, shaped and glittered to give a beautiful look.
Flip and Fold Folio
The  closure of the album is magnetic and made with Crealies tag dies, a blingy heart and backed by a lacy flower die cut.
Flip and Fold Folio
Can you see the flower pearls  on the  base...they add such a lovely texture!

Flip and Fold Folio
Here is the look when you open the latch...
a dual panel which opens out further into a triplet.
Flip and Fold Folio
The upper flaps which are magnetic open up to reveal the design underneath.
The beautiful On the edge dies from Crealies are so eye catching!
Flip and Fold Folio
These 3 tags flip down to reveal  6 panels!
Flip and Fold Folio
Here is the  top trio with a pocket inside to hold notes, tags, recipes, to do lists etc.
Flip and Fold Folio
And here is the  lower trio with pockets made with Crealies tags.
I used Crealies Bits and Pieces stamps on one of the  pockets
Flip and Fold Folio
And here is the  whole folio when completely opened out.
Flip and Fold Folio
Here is the  Video to show you how the  mechanism is


Flip and Fold Folio Tutorial.
Rather than give a full fledged Tutorial, I am sharing the salient steps so that you can adapt the  Tutorial to any  large dies in your collection  or you can even use the  idea for hand-cut shapes
Flip and Fold Folio Tutorial 
Die cut 6 tags from fairly thick cardstock using the biggest die in the
Flip and Fold Folio Tutorial 
Die cut 12 tags from pattern paper from the next size smaller tag from the same set.
Just to get a unique symmetrical shape, I have shaped the lower part of all the  tags
using on the edge die cutting as shown below.
Flip and Fold Folio Tutorial 
Create Flaps
Die cut 3 smaller shapes from card stock using the largest tag die
and 6 smaller shapes from pattern paper using the  next smaller size die.
Flip and Fold Folio Tutorial 
Here is how you can place the  die cut shape on the  edge of the die to create a new shape! 
Flip and Fold Folio Tutorial 
It is best to tape it so that it doesn't move while die cutting.
Flip and Fold Folio Tutorial 
You need 3 flap pieces cut from card stock and  6 flap pieces cut from pattern paper pieces to stick on either side of the  card stock flap pieces.
Flip and Fold Folio Tutorial 
Make connecting strips using card stock as long as your tag at the middle part and
about 6 1/2  x  1  3/8  inch  and  6 1/2   x 1  5/8   inch.
Score ½ inch from either end as shown. 
You can increase or decrease the middle width depending on the  thickness of your folio.
If you going to add many tags...increase the width in between
the outer 1/2 inch scores in both the strips

Flip and Fold Folio Tutorial 
Create strips to connect the flaps to the base tags using
approx 6 cm x 1 1/8   inch [I used a mix of  centimeters and inches as it gave
the most accurate measurement in  this particular case....
you can adapt to suit your design]. Score 1/2 inch from either end.

Flip and Fold Folio Tutorial 
To connect the 3 upper tags to the  3 lower tags:
Take 3 cardstock strips 6 cm  x 1 inch and score at 1/2 inch [in the  center]
Flip and Fold Folio Tutorial 
Here is how it will look when you attach the strips
Flip and Fold Folio Tutorial  
You can add magnets to the  inside of the  flap if you wish. Do so before sticking the pattern paper. And this is how it will look after adding the pattern paper
Flip and Fold Folio Tutorial 
You can use these as mini planners, recipe booklet, add special photos or you can add notebooks, pens etc inside each panel and adjust the  measurements accordingly.
I hope you liked this idea on how to extend your dies.
Flip and Fold Folio
Crealies  Dies:


Related Posts Plugin for WordPress, Blogger...