30.6.11

Super Easy Ribbon Flower Tutorial

No Sew Ribbon Flowers Tutorial
Nowadays since most of the crafting I do involves my little one who is just 5 I don't like to use a needle and sew. There are many ribbon flower tutorials around but the majority involve sewing. Here we are sharing a recycling project which is so super easy that even a little helper can chip in.This flower was inspired by a post I saw on Fabric Bows and more
Ribbon Flowers
Here is what we used to make the No Sew Ribbon Flower
Easy Ribbon Flower Tutorial
  • Aluminium Foil Box- this particular one was from a takeaway eatery and I had not felt like throwing away! You can use scrunched up silver/aluminium foil too- If its thick variety its better.
  • Ribbon
  • Glue drops- you can use a glue gun - I don't have one
  • Scissors
Recycled Aluminium Box craft
Cut out a strip of foil - thickness depends on how strong the foil is- if its the thin variety cut out a wide strip and fold it lengthwise to increase the strength and thickness
Easy Ribbon Flower Tutorial
If you want to make a large flower cut out a long strip.You can leave the edges of the aluminium foil strip a little rough as it helps the ribbon to stay snugly in place and not slide all over!

Easy Ribbon Flower Tutorial
Start rolling the ribbon around the foil strip from one end overlapping as you roll.Roll the strip tightly and it stays in place fairly well without any glue.
Easy Ribbon Flower Tutorial
Here is my little one rolling the ribbon flower and our Cocker spaniel " Goldy" looking on longing to join in the fun.
Easy Ribbon Flower Tutorial
Goldy is one curious character and loves to poke his nose in whatever we do.The sad expression here is because we forbade him from "helping"
Easy No sew  Ribbon Flower Tutorial
Once you reach the end of the strip apply the adhesive of your choice and fold the ribbon over
Easy Ribbon Flower Tutorial
I like using Glue drops whenever I work with my daughter as its like a sticker and so easy for her

Easy Ribbon Flower Tutorial
Once your Aluminium foil- Ribbon Strip is ready start rolling in a spiral
Easy Ribbon Flower Tutorial
 Once you reach the end of the ribbon flower spiral again apply the adhesive and stick.
Easy Ribbon Flower Tutorial
Your Ribbon Rose is ready.
Ribbon Flower
This red one was our first one.
Ribbon Flower
Once we made a rose my little one wanted a leaf too!To make the leaf take a short strip of foil- you can use a thinner strip for the leaf
Ribbon Leaf tutorial
Roll green ribbon around it.
Ribbon Leaf tutorial
Apply your adhesive at the end of the rolled strip
Ribbon Leaf tutorial
Bend over the strip in a U shaped manner and your leaf is done
Ribbon Flower Leaf
Here is a smaller ribbon rose in my daughter favorite pink color! Do all little girls love pink?!!
Ribbon Flower
Then we made one in orange polka dotted ribbon
Ribbon Flower
Ribbon Flower
The Aluminium foil spine of these roses makes them fairly sturdy and they maintain their shape well,are light weight and don't crush easily.And if  like me you hate to throw away stuff you may be having Aluminium foil strips at home just waiting to be recycled. Do give our ribbon flowers a try!
Please do tell me what you think about this latest project of ours.

Here are links to some more handmade flower tutorials made of unusual materials.

Handmade Rose tutorial -Clay/playdough,Mseal,Marzipan,Styrofoam[Thermocol]


Playdough Rose tutorial

Thermocol flowers tutorial

Edible rose tutorial

Mseal Rose tutorial

Handmade Flower tutorials - Crystal flowers,Easy Beaded flowers, Sponge roses


Crystal Flower tutorial

Beaded flower tutorial

Spoon flower tutorial

Sponge flower tutorial

29.6.11

Winnings

Blog Candy
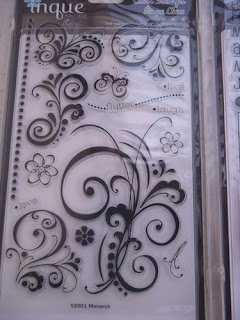
I am so excited today to share some news. I have won something for the very first time!Jessica a blogger friend had a giveaway to celebrate a century of followers and I had won some candy for a random comment. Such a sweety she is as she shipped the goodies all the way from the USA to India.My hubby received the parcel for me and asked me " what ?? and why ??? " I had a tough time explaining to him about our special world in blogo-sphere and how generous and utterly sweet people are! He thinks we are all crazy!!
Here is what Jessica sent me. Do drop by her blog and check out her amazing creations- she makes awesome cards, wreaths and amazing home decorations. She had made a mindblowing " wishing well" and I had joked to her that if I won her blog candy she should ship it to India!


Here is my little one eagerly checking out each and every stamp.She wanted to start off crafting right away but unfortunately stamping is an art I have no experience with so I had to promise her that we would learn it soon and then play with our new goodies!
Blog Candy win
I also won a  prize  for my handmade flower craft entry at Alex's Made it Myself Linky Party at You hade me at craft. I am yet to decide on my prize from Oh my crafts as this is the first time I will be ordering craft supplies online!!
Win at You hade me at craft

26.6.11

Rainforest Tunnel Card and Tutorial


Tunnel card
There are 3 Indian card challenges going on for which I wished to participate  but didn't have the time to make 3 cards. After much pondering created a 3 in one card.
I needed to make
1.A window card with a sentiment for Anita's challenge- Lots of windows in this tunnel card!
2.A card with doodling for the Crafty JC challenge - drawing here is pretty much doodling and I am thrilled to say with a lot of contribution from my daughter .
3.A card inspired by rain for the Indian Craft room Challenge-this is a rain-forest theme card.I had to refresh my memory by researching the fauna and flora of a rain-forest for this card.

Ever since I saw the tunnel book concept I was fascinated. It looks so complicated but is in fact quite easy to make and hence sharing a tutorial.
Tunnel card
The specialty of the tunnel card is that you have to look through the window from different angles to see the full panorama.From each angle you will be able to see something new! we were able to achieve this effect in our card as you can see in the photos taken from different angles.
Tunnel card
How to make the tunnel Card [ also called Peep show]
Here I have used an A 4 sized card folded in half and cut for the front panel of the card.You can use whatever size you want.
Make the accordion spine of your tunnel card or tunnel book
  • Take fairly sturdy card stock with height equal to the height of the front of the card 
  • Score  lines on the card stock as shown.The score lines  should not be too close together as it will be the support for your inner panels. I scored the lines at 2 cm intervals.You can use an embossing tool or a pen which has run out of ink to score the lines.
  • Fan fold or accordion fold the score lines. The number of  folds you need depends on the number of panels and how much space you wish to give between the panels
  • Make 2 similar accordion folded spines 
Tunnel card Tutorial 1
Make the panels of the tunnel card
  • Make as many panels as you wish.I have 5 panels here.
  • You can use card stock which is thinner then the accordion spine if you are not embellishing it heavily.
  • The inner panels should be the same height as the front panel and cut slightly shorter in length than the front panel to help easy flat folding of the tunnel card.

Tunnel card Tutorial 2
You can use photo-editing software, graphics programs or do it hands on like I did to design your panels.
Tunnel card Tutorial 3
Overlap images and lay the panels on top of the lower one to design the position of your images.

Tunnel card Tutorial 4
Avoid heavy embellishments on the inner panels to prevent buckling.

Tunnel card Tutorial 5
Here we have filled in the greenery of the rain forest using sketch pens. I would have like to use paint but since it can buckle the panels of the tunnel card had to avoid. 
Tunnel card Tutorial 6
Shown below are the steps to make the panels- plan your scenery, cut the aperture and complete the scenery after cutting out the aperture.
Tunnel card Panel making steps
Here is my little one helping to embellish as well as draw the scenery.
Tunnel card Tutorial 7
Here is the panel which my daughter[ just turned 5 last month] helped to plan.The red flowers and cherries + the major part of the greenery is her work.She was so proud of her work.
Tunnel card Tutorial 8
As you go to the back of the tunnel card.make the border of the panels progressively wider.This gives the best effect for the tunnel card. Cutting the apertures smaller as you go towards the back panels makes your borders wider.
Tunnel card Tutorial 9
Assemble the tunnel card
Stick the panels of the tunnel card to the spine as shown.
Attach all the panels on one side and then start attaching to  the other spine. Fold the card flat while attaching to the 2nd spine to ensure that your tunnel card will fold flat and not buckle.
Tunnel card Tutorial 10
Tunnel card top view
You can dangle light weight embellishments from the back side of the panels for added effect.
Tunnel card close up
The tunnel card will stand on its own for a stunning display.
I hope you will have fun with this tutorial. You can make a tunnel card of your holiday photos by just cutting out apertures and layering them.You can use it to make a special card or even for a school project.
This is a super fun project for little ones- they can have fun with drawing, painting and using stickers[ mine just loves stickers!!]
Related Posts Plugin for WordPress, Blogger...