 |
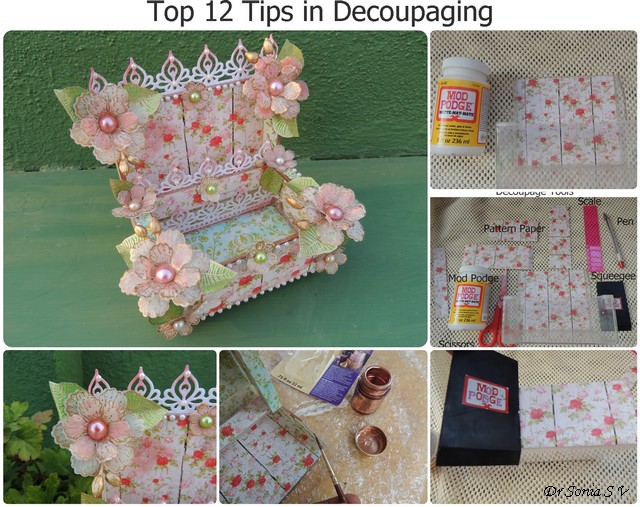
| Top 12 Decoupaging Tips |
Hi friends .....feels good to be back to blogland after a sabbatical. I had my favorite aunt and niece staying with me for a couple of weeks and I was soooo busy with them that I didn't have time to craft or go online to visit my blogger pals!
And I am so flattered and touched that many of you tried to get in touch with me to ask if all was well...crafty pals are the best!!
Mwah!
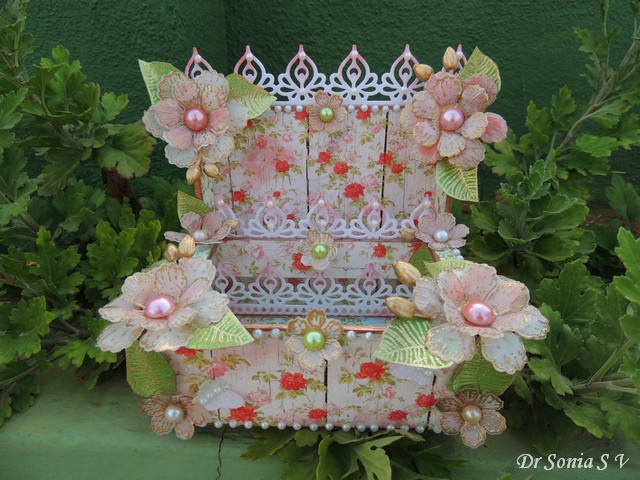 |
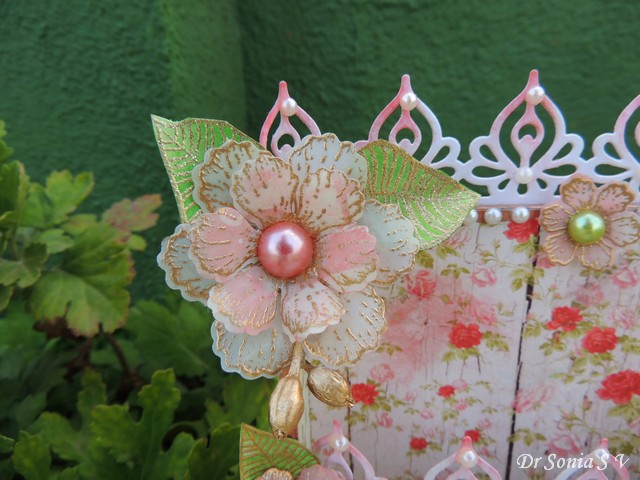
| Decoupaged Container |
If you are in need of a crafty fix but can't be bothered to create something from scratch,I highly recommend altering something you have at home!
And if you want to feel crafty while you are about it...try decoupage!!
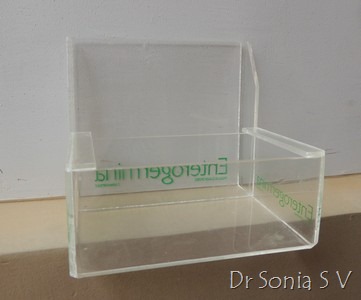 |
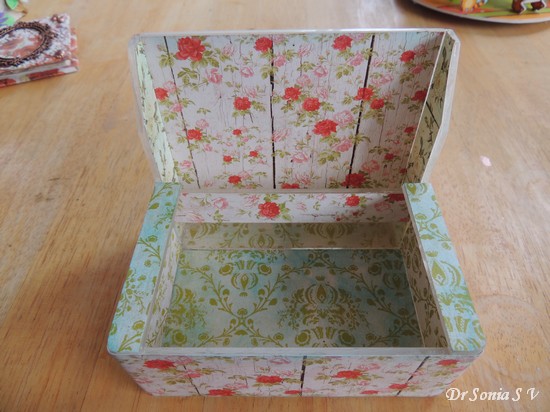
| Plastic Container |
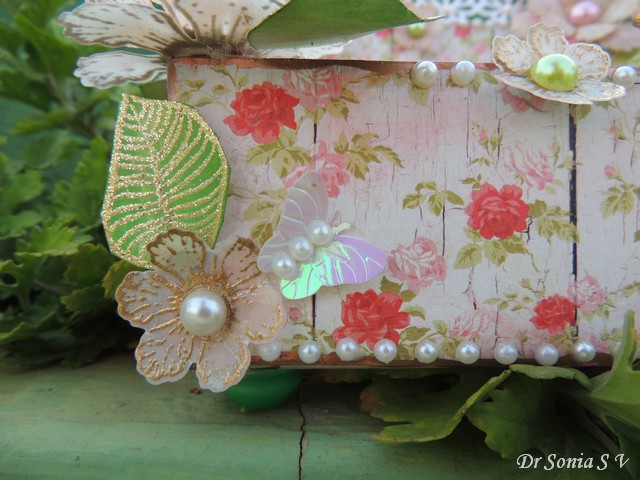
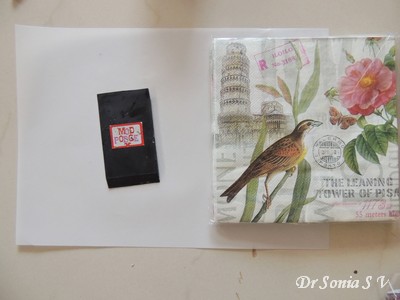
I prettied up the plain plastic visiting card holder shown above by decoupaging with
Ornate Annie papers [from Indian Pattern Paper company
Bob n Betty]
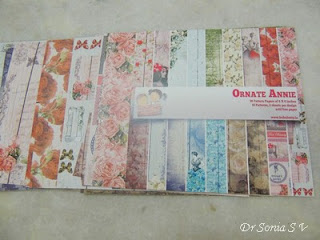 |
| Bob n Betty pattern Papers |
And embellished with copper heat embossed parchment flowers
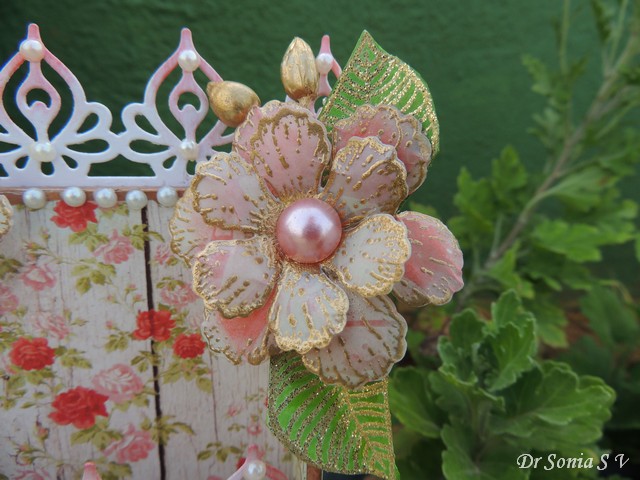 |
| Heat embossed parchment flowers |
And some golden stamped leaves and butterflies and pearls!
 |
| Heat embossed flowers |
Decoupaging is an age old craft and
easy and
tricky at the same time!It is one paper crafting technique which can frustrate if you are a bit sloppy and which can give such a profound sense of gratification when you get a crease less, smudge free beautiful project!!
Sharing a few Crafty Tips I have picked up over the years ...hope they will help you have a blissful time decoupaging!
Crafty Tip 1 - As in any craft the luxury of having the right products and tools makes decoupaging easier , fun and gratifying!!
Use popular decoupage glue and tools for the best results
Tools to make decoupaging Fun and Easy
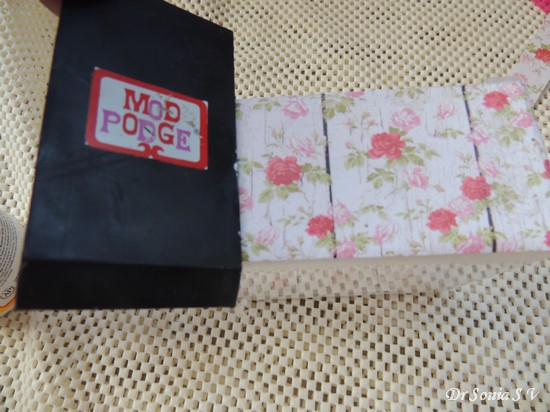
- Decoupage Glue- the most popular one is Modpodge as it has just the right consistency and flow to make the decoupaging process itself easier and its properties make it durable and long lasting. If you are not very bothered about the durability of your project or its artistic finish ,you can dilute regular white glue and decoupage but its a very very poor substitute for proper decoupage glue! There are in fact several types of modpodge for different decoupage surfaces and you can Check out this earlier post on types of modpodge and Modpodge tips and secrets for successful decoupage
- Scissors - normal one and a fine tip scissors if you want to fuzzy cut pictures to decoupage
- Scale- to measure out the sides of your projects and pattern paper
- Pen/ pencil to help mark your pattern paper and cut
- Squeegee- I have used a different type of plastic squeegee in my Sospeso Trasparente projects which is rather nice but totally in love with the squeegee in the Mod podge kit because of its rubbery nature and wedge spage at its ends which allows one to reach awkward nooks and corners like I will show in the subsequent pictures. An alternate is an old plastic credit card but the squeegee is much much superior!!
- Not shown in the picture : Sanding / distressing tool and
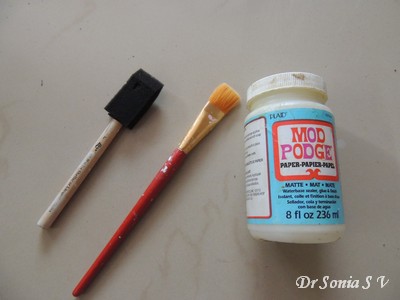
- Brushes to apply mod podge - use sponge brushes or regular brushes
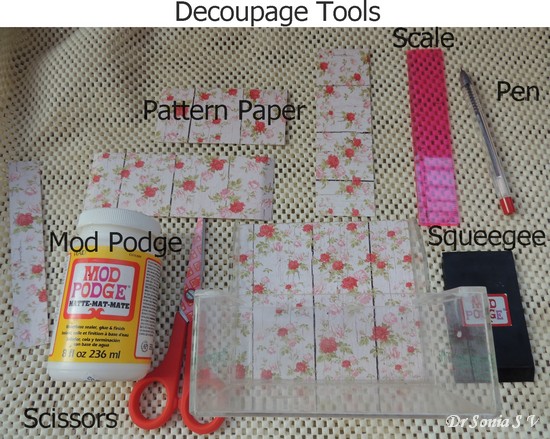 |
| Decoupaging Tools |
Measure your project and cut pattern paper to line it.
- Crafty Tip 2 : Spend some time on measuring and cutting the paper to size as if you glue on even a few millimetres extra it increase your work later on as you will need to trim it and sand it!
 |
| Decoupage tutorial |
- Crafty Tip 3: Plastic is not the easiest of materials to decoupage on as its slippery and your paper can just slide off and leave you frustrated!!If your plastic is super smooth ,sand it to give it a grip .
 |
| Decoupaging tools |
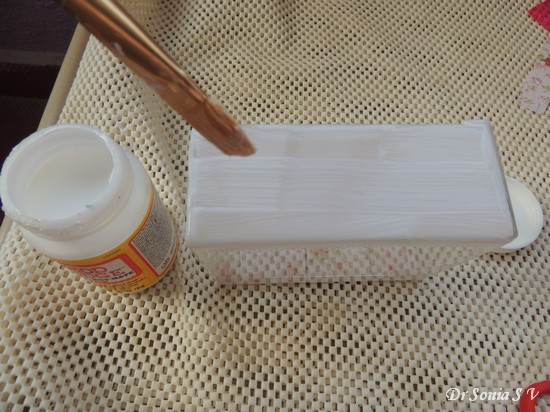
- Crafty Tip 4: Apply decoupage glue uniformly using a sponge brush or a paintbrush [ the paintbrush I am using is part of the Plaid Decoupage Kit]. A sponge brush may be easier for beginners but I personally hate the glue wastage as the sponge soaks up precious mod podge and its more difficult to clean it to reuse!
- Crafty Tip 5:If your paper is thick you will get best result if you slightly mist it with water or even apply a thin coat of decoupage glue on it too before sticking it to your decoupage surface.
- Crafty Tip 6: Dont apply too much glue on your surface as it will just wrap and wrinkle your paper later on.
 |
| Decoupaging tutorial |
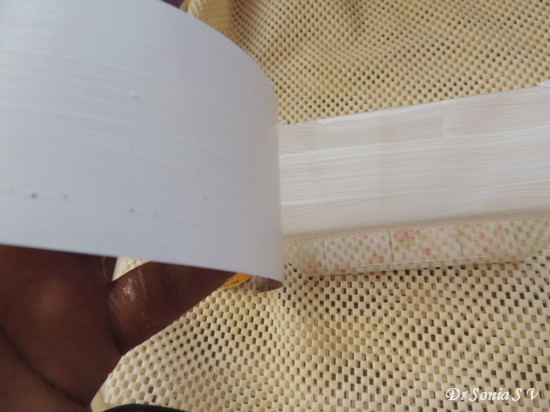
- Crafty Tip 7: Start sticking your paper from the shorter end ....that is if you have a rectangle of paper as shown below.... start sticking from the short side...this way you have more control and are less likely to get wrinkles on your paper.
 |
| Decoupaging Tutorial |
- Crafty Tip 8 : Once you have stuck on your paper dont forget to firmly smoothen it . This will not only ensure firm adherence of your paper on the surface but also remove excess glue and air bubbles from under your paper and prevent wrinkling of your paper
You can actually use the edge of your hand for this but the the best tool I have found for this is the Squeegee. You can alternately use a brayer[ used in stamping],an old credit card or plastic scale.
Use thesqueegee to firmly but gently [ too much force and you will slide your paper off the project!] slide over your paper and the excess glue will come out from the edge of the paper at the end and you can simply wipe it off.
 |
| Decoupage tips |
Using the squeegee you can easily slide into corners which are otherwise difficult to reach as you can see in the picture below.
 |
| Decoupaging Tutorial and Tips |
Crafty Tip 9: If you want to ensure a totally clean, smudge and glue stain free decoupaged surface put
wax paper or parchment paper over the paper you have stuck before sliding your fingers,brayer or squeegee over it. This extra step is highly recommended when working with delicate tissue paper or light colored pattern paper.
 |
| Decoupaging Tips |
- Crafty Tip 10 : WAIT and WAIT before you apply your top coat of modpodge as if you are impatient...your paper will crinkle and wrinkle and even slide right off your project! There is no fixed time as it will depend on the thickness of your decoupage paper and the climate...the best bet is to wait at least an hour or so! You can apply 2-3 top coats allowing enough drying time in between coats.
- Crafty Tip 11: If you are bothered about the "stickiness" of your final mod podged project... use a clear acrylic spray sealer or use Asian paints Aquadur Varnish[ Thank you Divya Thallap for this info]
- Crafty Tip 12 : Don't hesitate to use Paints and Inks.
 |
| Parchment Flower |
Sponging the decoupaged paper with distress inks can help tone a project down and you can use the same shades of ink to sponge other embellishments you later add to create a uniformity to your project. Here I sponged my parchment flowers, Spellbinders lacy borders and areas of the decoupaged pattern paper using the same shade of Distress Ink.
 |
| Decoupaging tutorial |
The edges of a decoupaged project may at times be tricky and time consuming to decoupage.In the picture above you can see the uncovered plastic edges on the container.
In such cases you can go about it the hard way by cutting thin strips of paper to decoupage those areas or opt for an easier and prettier option by just painting those thin edges and corners!
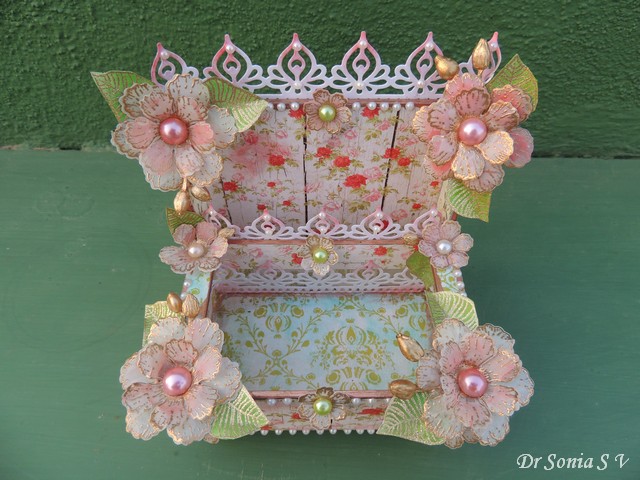 |
| Altered Plastic Card Holder |
I used a beautiful product by Plaid called
Liquid Leaf to paint the edges of my decoupaged project metallic copper.
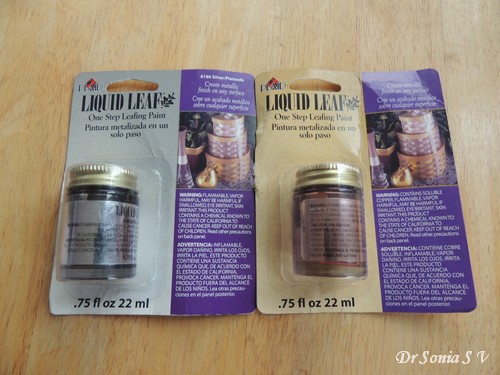 |
| Liquid Leaf |
Liquid leaf is a free flowing gorgeous metallic paint which can be used on
metal, glass, ceramic, clay, wood, canvas etc .You can read more about it on my CT post for Crafters Corner here : Metallic Effect with Liquid Leaf
I love the thin fluid consistency of Liquid Leaf which made it super easy to quickly paint the thin edges of my plastic container!
 |
| Liquid Leaf |
And here is the final altered project.
I hope some of these crafty tips on decoupaging were useful to you...do add your own tips in the comments.
 |
| Liquid Leaf |
And dear blogger pals I will get around to visiting you this week!! I sure do have a lot of catching up to do!
Paints and Inks : Liquid Leaf Copper, Distress Inks
Tools : Crystal Katana /Tanto
Adhesives : Tom Bow Multi mono, Modpodge
Decoupage Tools : Modpodge Tool KitPapers : Bob n Betty Ornate Annie, Papericious
Dies : Heartfelt creations Botanical Wings , Spellbinders Parisian Accents
Stamps : Heartfelt creations Botanical Wings


Thanks for sharing all the tips and tricks to decoupaging!! Glad to know you are having a good time!
ReplyDelete-Berina
Moxie Craftie
Great to see you back in blogland.
ReplyDeleteThank you for sharing your knowledge with decoupage with this brilliant project.
I want to let you know that I still have not received the die which I won in your candy.
Have a nice weekend!
xxx Margreet
Margreet ....I just mailed Jeanne and I am hoping she will be able to sort it out for you
DeleteBeautiful creation.
ReplyDeleteWonderful up cycling and such pretty colours and design. Great to see you back in blogland.
ReplyDeleteHave a lovely weekend, Julie x
Thank you so much Julie....will be visiting you soon
DeleteThank you Elly...feels good to be back
ReplyDeleteThank you!!
ReplyDeleteGood to have you back. I missed you & was planning to email this weekend. Thanks for sharing your beautiful project with a tutorial.
ReplyDeletewelcome back sonia, its always worth to read your post which carries a lots of infos and tips. thanks for sharing dear. happy to note that you had good time with your aunt
ReplyDeleteMissing you in blogland! Glad to know you enjoyed your time with your aunt!
ReplyDeleteThanks for sharing Decoupage tips in such details! Love your projects!
Brilliant to see you back in blog land! What a way to come back with this fabulous tutorial. You changed such a mundane item into something wonderful. Debra x
ReplyDeleteNice to have you back Sonia and with a lovely floral project as well.
ReplyDeleteHope you have a good weekend.
B x
Fabulous creation and tutorial Sonia..Loz
ReplyDeleteSuch a stunning project ! I adore your flowers ! Thank you for the tutorial !
ReplyDeleteGreetz
Margo
Good to see a post up on your blog after a Break ! Thanks fo rthe tips ,I know where to go whenever I try decoupaging !
ReplyDeleteWonderful altered box. Glad you had a nice time with your family.
ReplyDeleteA very beautiful upcycling indeed ma'm :) TFS these helpful infos on decoupaging :) great to see you back.!!! <3
ReplyDeleteWow this looks awesome and thanks for such useful tips.glad to see u back.
ReplyDeleteExcellent project. Very nicely explained and very detail informations. You stimulate me a lot. Nice to see you back. I missed you. Love xx
ReplyDeleteSOooooooo glad to have you back, I missed all your creativeness. This recycling is so very beautiful, love the gold, pearls and the flowers and all your WONDERFUL tips on decoupage.
ReplyDeleteHave a good weekend.
Faith
x
Welcome back sonia....also which varnish is it...aquadur has 3 variants.
ReplyDeleteOutdoor or indoor both are cool.
DeleteGlad to see you back!!!! Have missed you!!! LOVING these tips!! I am getting ready to take on probably my BIGGEST decoupage project to date ... it will take me awhile, but I will get there! LOL!!
ReplyDeleteGreat tips. When working with large - wide objects I find applying glue in portions helps. So As I apply the glue (maybe 2" at a time)I stick the paper and smoothen it as I go to eliminate bubbles or wrinkles
ReplyDeleteFantastic tips and an absolutely amazing creation. From the papers you chose to those beautiful die cut flowers and leaves this project is just gorgeous. Hugs!
ReplyDeletegood to see you back Sonia !! lots of info in this post,the liquid leaf looks interesting !!
ReplyDeleteSo glad to see you back Sonia and with another fabulous tutorial..love the end result to your little box..the papers and flowers are gorgeous..
ReplyDeleteluv CHRISSYxx
Welcome back Dr. Sonia! We all missed you! :) Your recycled visiting card holder has a gorgous look now! Amazing work and Love the flowers!! Thanks so much for all the tips and tricks, very interesting to read and so useful!
ReplyDeleteWow. What a transformation of your plastic box. Beautiful as ever. Hugs Mrs A.
ReplyDeleteGorgeous project. Thanks for the tips. hugs, Teresa
ReplyDeletelooking awesome, superb tutorials.
ReplyDeleteWonderful project. So glad everything is is good by you, was thinking have not seen any posting from you in awhile and hope that things are good with you. Love your new project and thanks for all the great tips.
ReplyDeleteBlessing, Pat
So happy to see you back :) Beautiful creation, Thanks for sharing all the info, your tips are very helpful. Also want to say a Big Thank you, I received big shot won at your candy & will try my hands on it soon, thanks for everything.
ReplyDeleteRegards,
Priyanka
How nice to have time with your aunt and niece, Sonia! Such times are precious. Sonia, thank you for taking the time to photograph and chronicle your posts. The his one was very informative! Wonderful tips, and they make so much sense... But I wouldn't have thought of many of the steps had you not explained them. Your altered project is lovely, with so many delightful touches!
ReplyDeleteWelcome back to blog land, Sonia!
Hugs,
De
Missed you and your creations
ReplyDeleteI thought you are on your yearly trip to your dream destination:)enjoying vacation .Good to see you back .Thanks sharing the tips .
I was missing your posts. Welcome back.And the decoupage work is awesome. Please share some tips on distress ink techniques too.
ReplyDeleteWhat a beautiful creation!
ReplyDeletePam
scrap-n-sewgranny.blogspot.com
Your project is so pretty!
ReplyDeleteP/s: Personally, I prefer to use matte gel medium instead of mod podge. It works the same way but it isn't sticky when it's wet so it is easier to work with. My problem with mod podge is when it is used as a sealant...dust sticks to it and you can't put anything on top of it because it will stick to it.
So glad to have you back Sonia. I missed your posts, but spending time with family is very important. Great post. I love decoupage and definitely will use some of your tips. The finished box is gorgeous!! Welcome back! hugs :)
ReplyDeleteGreat to see you post again and glad that your absence was due to a happy reason. Great tutorial, thanks for sharing your tips. Cara x
ReplyDeleteWow, this is so amazing, like a flower throne!!
ReplyDelete♥Hugs Valentina♥
Stunning box. Love all the details. Thanks for the fabulous tips.
ReplyDeleteHave a creative day.
Hugs Nana
♥ My Crafting Channel ♥
♥ 2 Creative Chicks ♥
♥ Silhouette Challenges ♥
♥ Paper & Stitches ♥
♥ Sunny Day Crafting ♥
I don't know why your posts weren't showing up on my feed!! I'm so sorry I haven't been around to comment on the last few...catching up now!! This is absolutely stunning, Sonia!! I love, love how you decorated the box!! The papers are gorgeous and I love the flowers!! Awesome tutorial, too!! Have a great day!! Big hugs :)
ReplyDeleteLisa
A Mermaid's Crafts