Showing posts with label Kids Cards. Show all posts

1.8.19

Interactive Spinning Ball Card Tutorial

Spinning Ball Card
Hi friends, Thank you so much for the  warms words of welcome in my last post on a Beach Ball Spinner Card. Sharing another version of the  Spinning Ball Card...this time I added sneakers and a T shirt and stenciled on a net and some bricks. Once again I have used dies, stamps and stencils from Crealies  .
Spinning Ball Card
I this would make a fun Birthday card..what do you say friends?
Spinning Ball Card
The dimensions are slightly different from the  Beach Ball Spinner Card but the  Tutorial is nearly the  same and here is the  video showing the  Ball Spinning


Supplies : Stencils , Stamps and Dies from Crealies

30.7.19

Spinning Beach Ball Card Tutorial


Hi friends , it feels so good to be back on my blog after a long sabbatical. My daughter had vacations in April - May and life was even more busier in June that blogging took a backseat.

We went for a vacation to an island resort in the  Maldives and it was simply the  best holiday ever with lots of fun on the beach and in the  water, swimming and snorkeling and really being in tune with nature as the  pristine waters of the  Maldives are simply fabulous for marine life.

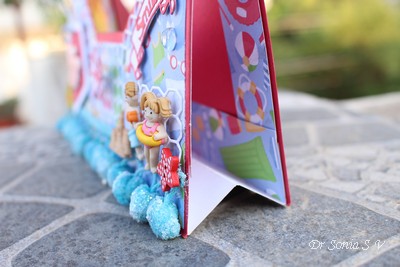
This card reminds me of a lovely beach holiday and it is a special interactive card.

I used the  big ball die from Crealies  and lots of other Crealies  dies to make this fun interactive "Spinner Ball" Card.

The embellishments are all buttons I had hoarded for years waiting for the  right project!


The Beach ball on the  card spins on a wooden skewer stick!

And in the  picture below you can see it horizontal.

I had shared a Tutorial to this Spinning mechanism long back : Spinning Card Tutorial
And here is an updated version specifically to make a Spinning Ball Card
Here is how you can make the  spinning card mechanism:
Materials Required
Crealies Ball Die Cardzz No .14 
Cardstock : One A 4 card- fold in half, 2 pieces of 1 x 1 inch card, One card 8 x 4 inches
Craft Knife/Scissors
Skewer stick- at least 2 inches longer than the  ball
Adhesive : Liquid Glue, Adhesive tape
Spinning Beach Ball Card Tutorial 

You need 2 ball shapes...my beach balls are made with Crealies  dies[Crealies  Ball Die Cardzz No .14] and are pretty big.

Fold an A 4 card in half and place the  ball [half the  ball]on the  folded edge as shown above.
Mark the  semicircle around the  ball.
Spinning Beach Ball Card Tutorial 
Die cut or hand-cut out an aperture on the  folded edge of the  A 4 card in such a way that there is at least a 1/4 inch margin around the  ball when you place it as shown above
Spinning Beach Ball Card Tutorial 
Glue a skewer stick in the  center of the  ball using adhesive tape and strong wet glue.
Spinning Beach Ball Card Tutorial 
Stick the  other ball on top and hold with clips till the  glue dries
Spinning Beach Ball Card Tutorial 
Open the  folded A 4 card and place the  ball with the  stick in the  center of the
aperture so that the stick lies in the  groove of the fold. 
Spinning Beach Ball Card Tutorial 
Score and fold the
two 1 x 1 inch card strips every 1/4th inch to get an M shape.

Spinning Beach Ball Card Tutorial 
Stick the  outer arms of this "M" on either side of the  skewer stick in such a way
that the stick can move freely inside the  groove.
Do this on both sides so that the  ball can swing and spin freely.

Spinning Beach Ball Card Tutorial 
Optionally add a base using an 8 x 4 inch card scored and folded every inch.
Fold in such a way as to get a W as shown above and stick the  2 outer arms of the W
on the  base of the  folded A 4 card as shown above and below
Spinning Beach Ball Card Tutorial 
Here is a short video showing the  card in action

Decorate as you wish and your Interactive Spinning Ball Card is ready!

I hope you liked this card.
Supplies used : all the  dies are from Crealies   and you can buy them here : Crealies
 Linking to  Sisterhood of Crafters Challenge Play Ball
Edited : This project got the  Top 3 Award at Sisterhood of Crafters

30.10.18

Owl Shaped Card

Owl Shaped Card
Hi friends...sharing a sweet little Owl shaped card to wish you a wonderful week ahead. This is my DT post for the Cuttlebugmania  Challenge where the theme is "Halloween Animals".

I know we are supposed to make scary projects for Halloween featuring spiders , bats and maybe even cats . I did use Halloween themed papers to make my owl but she did turn out too cute...what do you say friends!!

Here are  previous versions of the Owl shaped Card : Owl shaped fancy fold card 1 , Owl shaped card Gate fold card 2 and Fancy Fold Owl Card

Supplies : Dies :  Sizzix Owl Label Fold A Long. Flower : Spellbinders Magnolia. Leaves :  Cheery Lynn  Rose Leaf Strip and Heartfelt Creations Botanical Wings Die
Papers : Debbie Mumm Harvest and Holiday

15.10.18

Flying Unicorn Card

Flying Unicorn Card
Hi friends...sharing a super cute card featuring unicorns flying amongst  puffy clouds!Each unicorn was stamped, heat embossed golden and watercolored with Zig Watercolor Brush Pens and popped up on a multilayered cloudy background created by Distress Ink blending
Quick stamp coloring
My new found technique of using a coordinating die to color the matching stamp was really helpful to quickly sponge in color and highlight the tiny clouds stamped on the bigger clouds!
I am surprised at how cheerful this simple card turned out to be!

Supplies : Dies :  Winnie and Walter Happy Cutaway ,Gina Marie Stitched Cloud Border,Crealies  Crea-Nest-Lies XXL  no. 77
Stamp and Die Set : Hampton Art [Mama Elephant] Over the rainbow Unicorn
Stamps : Hampton Art [Mama Elephant] Over the rainbow Unicorn, Cluster of stars from Winnie and Walter Wishing You, Spiky snowflakes on the Happy from Winnie and Walter Scenery Big Bang Flurries
Linking to
WCMD 2018 Dress Up Die Cuts Challenge with Gayatri- the Happy was stamped with stars/snowflakes 
WCMD 2018  Ink Blending Challenge with Lea- used  Ink blending with  Distress Inks used to create the sky background 
WCMD 2018 Stamp Images Mash Up Challenge with Jessica - used 3 stamps 
WCMD 2018 Coordinating Die Coloring Challenge with Kelly- used the technique to highlight and color the  clouds a darker shade
WCMD 2018 Number Cruncher Challenge with Keren- used  2019 and 4 unicorns

22.6.18

Magnetic Shaker Bookmarks Tutorial

Shaker Bookmarks
Hi friends Thank you so much for the kind words on my Memory Bottle. Sharing a really fun craft idea....magnetic shaker bookmarks.I used some gorgeous dies from Crealies to make these cute shaker cups.
Magnetic Shaker Bookmarks Tutorial 
The cups have see through domes and would look cute as decorations or fridge magnets.
Magnetic Shaker Bookmarks Tutorial 
I originally made them as shaker cards for my Crealies DT post but recently I went to a Craft Event [ will share a post on that soon]and met a blogger friend Saumya Mohanty who gifted me super cute magnetic bookmarks .
Magnetic Shaker Bookmarks Tutorial 
I loved Saumya' idea so much that after I got back home I altered the "cards" into magnetic bookmarks.
Magnetic Shaker Bookmarks Tutorial 
They are thin enough to allow you to close the book but sturdy enough to be used as a book mark and are super fun to play with!
Magnetic Shaker Bookmarks Tutorial 
I used gorgeous papers from DCWV Snack stack and some super cute shaker elements  to make these fun shakers.
Magnetic Shaker Bookmarks Tutorial 
I hope you like the idea ..There are so many steps involved in making these though they are pretty quick to make ...so I have made a short video for you.


Magnetic Shaker Bookmarks Tutorial 
Do tell me what you think of these cute bookmarks!
Supplies : Dies :  Crealies Cardzz 05 A, Crealies Cards 05
Stamps : Crealies Text and Co No 08 ,Crealies Bits and Pieces No 116,Crealies Bits and Pieces No 114
Crealies Dies /Stansen:


Papers : DCWV Snack Stack, Lemon one is an unbranded paper
Sequins and Hearts Shaker Elements : Dress My Craft , Crafters Corner

11.6.18

Shaker Rocker Card Tutorial

Shaped Interactive Card
 Hi friends...Thank you for dropping by. I have a really fun project and Tutorial   to share. I made Interactive Shaker cards which have the classic window with shaker elements and in addition these shaped cards rock from side to side!
Shaker Rocker Card
 I made 2 milkshakes  as my DT project for Crealies for the new release blog relay . I first made a Kiwi milkshake. I love Kiwis...do you?

Shaker Card
 Created the froth in the milkshake using Crealies stamps which I heat embossed white and  made a gorgeous yummy creamy swirl atop and added a straw too!
Milkshake card
I had so much fun creating one milkshake card that I had to make another one too....and that is a strawberry milkshake!
Rocker Card
I stencilled over the Crealies Cardzz 05A die with Distress Inks  and used my friend Rajni Chawla's  Crystal Clear powder to create the gorgeous sparkling cream swirls.
I also added a real straw inside the strawberry milkshake...so you can guess how really big these cards are!
Milkshake Card

If you are familiar with making shaker cards these are pretty simple ...yet if you are interested I have a detailed Tutorial in the video below which also shows the rocker action.


Crealies Dies / Stansen:

Crealies Stamps/Stempels:


And do drop by the Crealies Blog to see lots of fun projects featuring the new Crealies release...there are milkshakes, cappuccinos, smoothies and more yummy  creations!
Here are links to more Shaker Tutorials

Other Supplies : Papers : DCWV Snack stack, Sequins from Dress My Craft 

8.10.17

Easy Diwali Cards

Handmade Diwali Cards
Hi friends...we are having our festival Diwali in a few days time and these are the quick and easy cards my daughter and I made for her teachers.
Handmade Diwali Cards
Diwali is called the "festival of lights" and during this time we light up our homes with little lamps called diyas [shaped just like the one in the card]. It is so amazing to see !
Handmade Diwali Cards
We made the cards in variations of a rainbow color scheme as Diwali too, like most Indian festivals is a colorful affair with everyone dressing in gorgeous new dresses and making and gifting yummy colorful sweets!!
Handmade Diwali Cards
 My daughter used a stencil and distress inks  to make the different variations of the cards. I helped in the cutting and matting of the cards!
Stencil
Each stencil card was layered on magenta colored metallic card stock and matted again on white card stock so though simple and flat it has lovely layers to it.
Handmade Diwali Cards
Most of my regular readers know that my daughter has an artistic flair.....well she is experimenting with calligraphy [which she learnt on her own] and wrote the stylish sentiment inside the cards....forgive me for boasting like a proud mom but isnt it cool!!!
Handmade Diwali Card
And that is one set of easy Diwali cards !
Handmade Diwali Cards
Hope you enjoyed our collection!

Supplies : Distress Inks  , Itsy Bitsy Diya Stencil. Dies :  Spellbinders Labels 8,Sizzix Oval Scalloped,Couture Creations Scalloped Circles


Related Posts Plugin for WordPress, Blogger...