Showing posts with label DIY Stationary set. Show all posts

18.2.20

Birthday Gift set


Hi friends...sharing a card and gift set I made for a crafter friend for her birthday . I made a satchel bag shaped Pop Up Card , shaker book and a matching shaker bookmark

The bag shaped card was made using Crealies  Cardzz die and lovely papers from the  Indian brand Dress My Craft . It is the  same die I used to make the  Stationery set in this post: DIY Stationery Set

On opening the  card Birthday balloons pop up to wish my friend a Happy Birthday ...and I wrote her name too!

Here is the  back side of the  card


Here is the   matching shaker book I made using my new Fuse tool.


Here is the  video
Papers : Dress My Craft Vintage Saga from Crafters Corner
Crealies Dies/Stansen :

2.2.20

Slider Box Tutorial


Hi friends I love interactive mechanism and in this post I am sharing an Interactive box....a sliding box along with a matching Pop Up Card and a Post it note holder all made with nesting dies from Crealies  

I used fairy themed papers and add matching handmade foam flowers on the  front of the  box

I used one of my favourite Crealies  dies to make the   simple flowers from foamiran


The lid of the  box is special....it has a slider opening and on pulling up the  slider you can see an image inside!


I kept the  inside fairly simple as I plan to use it as a gift box...you can add cute scenic elements inside if you want to use it as a shadow box.


Tutorial 
Here is a generalized Tutorial to make the  slider mechanism . I am not giving any exact measurements as you can adapt the  techniques to any die in your stash
The sliding mechanism is in the  lid of the  box and is a modified slider card.
Materials
  • Nesting Dies. In this post I have used Crealies  dies : Crea Nest Lies XXL No 96 Ticket.
  • Card stock : thick good quality to make the  base so that you have a sturdy slider
  • Pattern Paper
  • Good adhesive
Make a box of dimensions such that  is smaller than the  largest nesting die you are going to use.
Leave a 1/2 inch flap extra at the  top of the  box on all sides [ see the  picture lower down the post to understand what I mean]

Tape 2 nesting dies together to get a wide frame- my new glass mat was really helpful in getting the  centering right!

Die cut 2 frames from card stock and one frame from pattern paper

I also die cut the  larger of the  die from cardstock and pattern paper to form a an optional base for the  box[ see picture lower down]

Make a slider piece so that its  dimensions are slightly larger than the  inner aperture of the  frame
To allow the  slider to move in and out of the  lid you need to create a pocket in the  lid for it using double sided foam tape or cardstock like I did here. The advantage of using cardstock is that is looks more polished and there is no danger of it becoming unstuck over time which is a risk with foam tape!

The card pieces are as long as the sides of the  box. 
The lower one measures 1 and 1/8 inches and is scored 1/2 inch from either side of its width leaving a 1/8 inch in the  middle as shown above
The side pieces measure 2 inches and are scored at 1/2 inch from either end of the  width and then 1/8 inch from this 1/2 inch score line


 The side pieces are stuck in such a way that the  1/2 inch sides are on the  frame and placed such that the  slider piece can move freely.

The lower one is stuck in such a way that the half inch part is on the  base and the  rest is free as shown below

This is how it will look with the  slider  in situ


Once you are happy with the  sliding ...you can add the top frame lid consisting of pattern paper frame stuck to the  cardstock frame.


Apply glue and stick


This is how you slider lid will look


Apply glue to the  box which you had made with an extra half inch free flap on the  top on all sides as shown


 Stick the box under your slider lid and press firmly


Optionally add another base layer to the  box and decorate as you please

I made a matching card for the  box by layering die cuts.


On the  inside I tried a new type of Pop Up Card design and it turned out super cool!I used the  nesting diecuts to create pop up layers one in front of the  other.


The "live laugh love life" is from a new Crealies  stamp set and is perfect for small cards and tags.

Here is the  side view showing the layered pop up mechanism

 Here is the  backside of the  box and card which is simple to give enough space to write a personal message.

To complete the  gift set, I made a matching shaker  Post- it note holder too.

I love how versatile nesting dies are and I hope you liked these ideas on how to use them in different ways
Linking to  Simon Says Stamp Wednesday Challenge - Anything goes

17.1.20

DIY Stationery Set


Hi crafters...sharing a cute and functional project I made using Crealies  dies: a DIY personalized Stationery Set.
My daughter and I often go to craft stores together and craft shopping  is one way we really bond! When she saw this pattern paper with cute succulents at our local craft store ,she begged me to buy it.I was skeptical at first as I really couldn't think of  how I would use cacti in my creations!!!
She wanted me to make something with it for her...and I made a stationery set.
The set has a Post it note-holder, a Mini bag, an eraser, Jumbo paper clips and a Matching pen.

The post it note holder is in the  shape of a school bag. I love how Annelies [ the  owner of Crealies  ] designs her dies with gorgeous useful add-ons like the  tiny pockets you can see in the  front and the  strap and buckle! The buckle slides so smoothly over the  strap!


I made a layered flower  using Crealies dies and can you see the  dangling "P"...it is my daughter's Monogram and I made it using Crealies  Alfies dies , foam and pattern paper.

The school bag is held closed with magnets and opens to reveal a 3 x 3 inch post it note....I love how the  Crealies  Cardzz dies are so perfect to make large utility projects.

There is space to add a small pen or pencil inside if you wish.


On the  other side I added a flap[ under which you can hide something secret!!]  and personalized it with my daughter's name. I also diecut several tiny numbers and added it to the  base to match with the  theme!


This is a tiny school bag and  turned out soo cute!


This was made with the  Crealies  Xtra set and it too has tiny dies to add the  cute pockets with the  buttons and a separate strap and buckle die too.


I constructed this using several layers of foam and card stock so it is sturdy yet light weight. It too has a magnetic closure ,


The mini school bag can hold a big eraser which is again monogrammed "P" using the  Crealies  Alfies. Love the size of these alphabet dies as they are tall but thin and perfect to fit in tiny spaces.


This is the  back side of the  bag


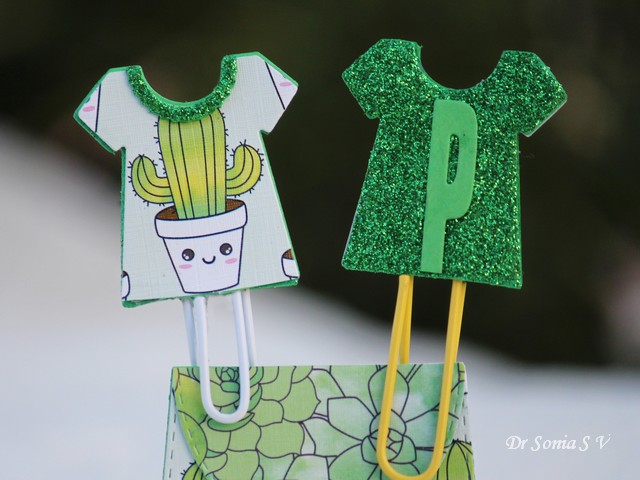
I used Crealies Uno Camera and Onesie dies to create these cute paper clips. 


These are very sturdy as I added foam and cardstock beneath the  pattern paper and the  paper clip is hot glued between layers of foam so that it doesn't come out easily. 
I personalised the  back side with "P".


The little camera turned out sooo cute!I have shared a similar Camera clip in this post too: Interactive Camera 


And lastly here is a matching pen  which was super easy to make by wrapping and sticking the  pattern paper around a pen.


I used glitter foam around the  pen cap and fuzzy cut an image from the  paper and added it to the  pen cap

Added the  alphabet " P" onto the  foam pen cap to complete the  set!


I hope you liked these ideas...my daughter loves this set . It was easy to make  and will make a lovely handmade gift set !

Crealies Dies/Stansen :


Related Posts Plugin for WordPress, Blogger...