|
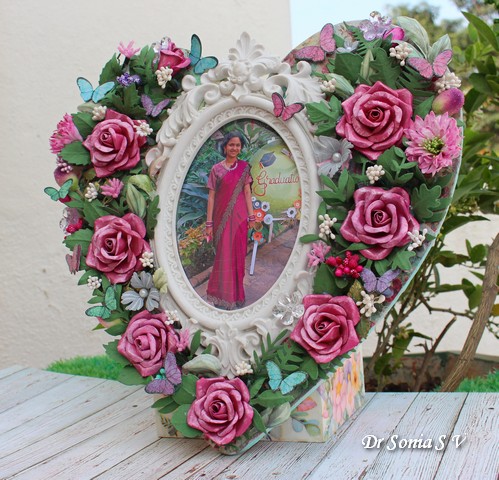
| Graduation Photo Framed |
Hi friends, I started this blog in
2010 to chronicle the various school projects and crafts I made with
or for my little one . Many of you have seen her on my blog and literally seen her grow up over the years. So this is a very special blogpost as I am sharing a frame I made to commemorate my little girl graduating 10th standard [equivalent to O levels]. Not only did she graduate with flying colours but her school honoured her by presenting her with an award for excellence in academics over the whole 10 year period.
 |
| Handmade Flowers |
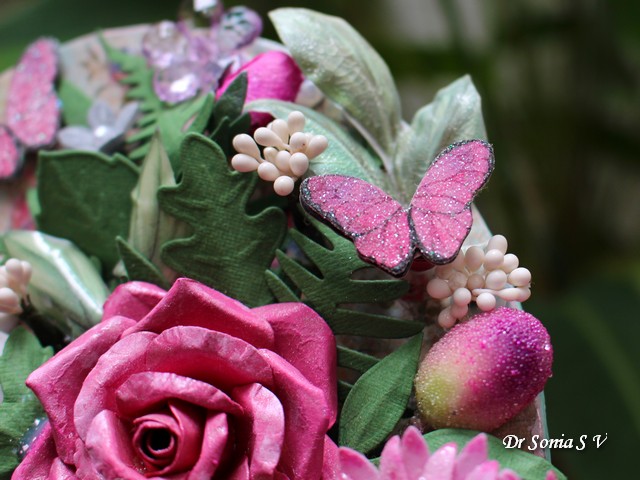
I framed her photo with lots of handmade roses inked, sponged and sprayed with a medley of colours to match the colours of my daughter's saree [ our traditional Indian dress]
 |
| Handmade Flowers |
I used a variety of materials including paper, foam, sospeso and shrink plastic to make the flowers and leaves.
 |
Handmade Flowers
|
The roses are made from very thick card stock to hold their shape well so they were quite time consuming to make.The foam flower was quick and easy to make.Here is the link for the
foamiran flower tutorial
 |
| Handmade Flowers |
The heart shaped base is made of MDF. It was given a coating of gesso and I decoupaged it before adding all the flowers and leaves.
 |
Graduation Photo Framed
|
I hope you liked this project and Thank you for dropping by and supporting!
Supplies used: Sospeso,Foamiran,Shrink Plastic, Resin Frame-all from Crafters Corner. Butterflies, Foliage Dies: Little Birdie