Showing posts with label Sospeso Transparente. Show all posts

6.3.23

Special Shadowbox

Shadowbox
Hi friends sharing a special project I made as a birthday present for my husband. He is a nature lover, an avid gardener and loves birds and butterflies . He also loves looking at houses and his catch phrase is "Enjoy". I tend to reach for Graphic 45 papers whenever I want to make something really special. So I made a special shadowbox using Graphic 45 papers and tried to incorporate all  my husband's favourite elements!
Shadowbox
I have used mainly the gorgeous Graphic 45 Artisan Style papers to make this project. 
The lovely light bulb is from Prima.
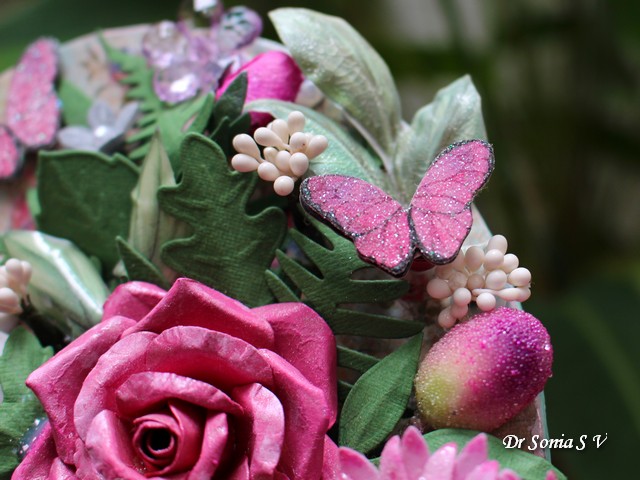
Made the peacock by layering 3 diecuts and adding pearls and glitter. Added flowers , leaves , fruits ad butterflies at different depths.

Shadowbox
A tiny bird nests on the rooftop hidden from direct view by the hanging flowers!

Shadowbox
Another little bird nests atop lovely flowers near the pillars of the house. Many of the  flowers in this shadowbox were made using the technique  of Sospeso Transparente .

Shadowbox
A pair of peacocks were  cut and layered atop the same peacock design to give a 3 D look.  I have used a lot of   flowers and butterflies fussy cut from snippets of paper and jazzed them up with glitter.

Shadowbox
Added tiny pearl  hearts on the feathers of the   peacocks.

Shadowbox
More butterflies, flowers and cute mushrooms on this corner! I used so many different dies to make the foliage as I wanted a medley of different leaves just like in nature!

Shadowbox
This picture shows the multiple layers of the shadowbox. I think from this view you can fathom the  many hours I spent making this project. It was indeed a labour of love!

Shadowbox
The shadowbox has a protective glass frame and I decoupaged it with matching paper from the same paper stack collection.

Shadowbox
Supplies used: Dies :  DMC Foliage and Leaves 9,Little Birdie Meadow Foliage,Little Birdie Fresh Foliage,Little Birdie Fern Forest,Little Birdie Fern Foliage
Papers : Graphic 45 Artisan Style, Graphic 45 Nature Sketchbook,Graphic 45 A Ladies Diary, Graphic 45 Baby to Bride for the sides of the  shadowbox

26.1.23

Graduation Photo Framed

Graduation Photo Framed

Hi friends, I started this blog in 2010 to chronicle the various school projects and crafts I made with or for my little one . Many of you have seen her on my blog  and literally seen her grow up over the years. So this is a very special blogpost as I am sharing a frame I made to commemorate my little girl graduating 10th standard [equivalent to O levels]. Not only did she graduate  with flying colours but her school honoured her by presenting her with an award for excellence in academics over the  whole 10 year period.
Handmade Flowers
I framed her photo with lots of handmade roses inked, sponged and sprayed with a medley of colours to match the colours of my daughter's saree [ our traditional Indian dress]

Handmade Flowers
I used a variety of materials including paper, foam, sospeso and shrink plastic to make the flowers and leaves.

Handmade Flowers

The roses are made from very thick card stock to hold their shape well so they were quite time consuming to make.The foam flower was quick and easy to make.Here is the link for the foamiran flower tutoria
Handmade Flowers
The heart shaped base is made of MDF. It was given a coating of gesso and I decoupaged it before adding all the flowers and leaves.

Graduation Photo Framed
I hope you liked this project and Thank you for dropping by and supporting!
Supplies used: Sospeso,Foamiran,Shrink Plastic, Resin Frame-all from Crafters Corner. Butterflies, Foliage Dies: Little Birdie

This project was  chosen as a Designer Spotlight at Simon Says Stamp Monday Challenge Theme Flowers. How Thrilling and Thank you so much !


28.9.17

Handmade Bird house

Graphic 45 Birdhouse
Hi friends sharing a 3 D birdhouse I made using Crealies dies and gorgeous Graphic 45 papers with a bit of recycling thrown in.
Birdhouse
        This is a fall themed home decor idea with mushrooms, flowers, pearls and flowers galore. A little birdie perching on a tiny branch is peeking out of her home!
Birdhouse
This project has feathers, natural dried pollen,gorgeous berries ,  fabric leaves and a bronze mushroom. Here is how I made the stand and base for the birdhouse:
Cardboard recycling
I recycled a cardboard tube [ the inside of a roll of bandage] by wrapping it with Graphic 45 paper and used it to form a stand for the birdhouse.
CD recycling
Recycled a CD to form a sturdy base for the bird house. Layered discs of foam, cardboard and pattern paper to give extra height and strength to the base .To give some more height also added the cardboard tube leftover from foam tape under the CD
Birdhouse
The little garden on the base of the birdhouse has Sospeso Trasparente flowers, puffy fabric flowers, mushrooms, butterflies and birds! The tiny butterfly and hummingbird are popped up on acetate so they appear to literally fly!!
Sospeso Trasparente flowers
The shining white flowers winding around the stand above and the shimmering orange daisy you see below plus the shiny leaves are all made using the Italian art form Sospeso Trasparente [ you can read about it here : Sospeso Trasparente explained]
Sospeso Trasparente 
I used Crealies dies and scraps of Graphic 45 papers to make the birds . It is so satisfying not to waste even the tiniest bit of your favorite paper! The shimmering white feathers you can see peeking from places were also made using Crealies dies.
Birdhouse
The shiny butterfly disc was  made from a scrap of Graphic 45 paper and a glass cabochon!
Birdhouse
And that is how the birdhouse looks on our terrace garden.I hope you liked this idea.
I used the same Crealies dies to make birdhouse Tealight holders earlier this month [link here : Teacher's Day Gifts
Supplies : Papers : Graphic 45 Time to flourish ,Graphic 45 Time to Celebrate ,Graphic 45 Nature Sketchbook
DiesCrealies dies : Crealies Create a Box -13 Birdhouse, Crealies Double Fun[34]-Feathers,Crealies Double Fun-33 Birds,
Cheery Lynn  Mini butterflies with Angel wings,Cheery Lynn tiny things with wings,Cheery Lynn Sunflower,Cheery Lynn  Flourish 13,Memory Box Fringe Border,Wild Rose Studio Floral Frame,Provocraft Circles Die,Dienamics [MFT] Stitched Circle Scallop Frame

2.6.16

Origami Box

Paper Flower Tutorial
          Hi friends....I have always been fascinated by origami but never been very good at it! I can't even make a "flyable"  paper aeroplane ....so making this Origami Box was an achievement of sorts for me!! Hehe!
Paper Flower Tutorial
        You may have seen this type of box in blogland and it goes by different names including " Star Box".There are several tutorials out there with crazy origami symbols [which always look like hieroglyphics to me!]  but here is the tutorial by Christina which is nice and easy to follow: Origami Box tutorial.
Paper Flower Tutorial
          I experimented making a new flower using some Spellbinders dies and I think I can safely call it a Peony...what do you think friends..?
All the sparkle is "Diamond Dust" which I dusted generously on the flowers and the leaves . The silver leaves are foam leaves cut using Marianne dies and the green leaves were made with a WRMK Flower Punch Board and here is the tutorial : Easy Flower and Leaf Making Tutorial
Sospeso Trasparente 
        The little flowers peeking from under my huge Peony are Sospeso Trasparente flowers [ Details and tutorial here : Sospeso Trasparente tutorial ]
Clay Embellishment
        Since my box was made of pattern paper alone I needed some lightweight embellishments....all the silver embellishments you see on the sides and corners of my box look like they are made of metal but were made using lightweight air drying clay!
Origami Star Box
        Crafty Tip : Shallow molds like the  Martha Stewart molds pictured below are best to create clay embellishments for paper crafting as they are just the right depth...not too shallow or too deep.
For making resin embellishment for jewelry making or for a bigger project... like the dolphin and sea horse in my Ocean themed Box deeper molds are preferred as you can avoid the liquid resin overflowing from the mold
Clay Embellishments
Embellishments made with cheap air drying clay don't look very glamorous and some colors are downright "difficult to find the right project for" type if you know what I mean!
Liquid Leaf 
But since I had this gorgeous Liquid Leaf paint with me , I could create faux metallic charms!Here is the link to my DT post for Crafters Corner on Liquid Leaf 
Clay Embellishment
Unlike some type of paints Liquid Leaf is thin and nicely flowing so the intricate detailing of the clay embellishments remained nicely visible!
Clay Embellishment
        I  am on my way to make my 2nd origami box and sharing its picture below so that you can see how it looks like before its dressed up with pearls and what not.....yes you are seeing pearls galore in my projects these days as it's so much easier to use tiny embellishments ever since I got the Crystal Katana !
Origami Star Box

        I made the lid of my origami box quite sturdy by sandwiching a layer of foam between pattern paper and card stock.....I love using foam elements in paper crafts as foam is such a lightweight yet sturdy material...not to mention quite steadfast to glue on with the hot glue.
Origami Star Box
 And that's the lid removed to reveal the beautiful Lemon Crafts pattern paper visible on the inside of the box too.
Origami Star Box
          If you are a hoarder like me and keep waiting for a perfect project to use pretty pattern paper...then this just might be the project to showcase the prettiest double sided paper in your stash!
Paper Peony Origami Box
I hope you liked my  attempts at Origami....and yes I do have a tutorial for my "Paper Peony flower"...will post  it soon!
Supplies
Punches : Flower Punch Board, Martha Stewart Beaded ruffle border Punch
Special Tool : Crystal Katana 
Special Products : Liquid Leaf , Diamond Dust, Clear Rock Candy Crackle Paint
Pattern Paper : Lemon Craft
Clay Mould : Martha Stewart
Dies : Spellbinders Nestabilities Blossom Five,Couture Creations Scallop Square, Marianne Designs Anja Leaf 3 , Marianne Designs Anja Leaf 1

2.11.15

Altered Bottle with Volume Decoupage

Volume Decoupage
      Hi friends sharing an altered bottle with bright red lilies made using the technique of 3 D Volume Decoupage.
       I applied gesso to  and later painted a glass bottle with white acrylic paint .Since I didnt want a stark white base I sponged mowed lawn Distress Inks  over it to give it a pale green - creamish look.
Volume Decoupage
        The red lilies were made by cutting the individual flowers from a  volume decoupage sheet and heating and embossing each petal and leaf [As explained here: Volume Decoupage Tutorial ]
Volume Decoupage Sheet
          My bottle didnt have a cap so I made one using a Christmas Ornament [ also featured in this Christmas project : Paper Cone Christmas Tree tutorial]
Christmas Ornament
         I used a cool mixed media texture medium called Glass Beads Gel to coat my Christmas ball ornament
Glass Beads Gel
         The glass beads gel looks white and grainy when you apply it and has an adhesive property too so I didnt have to use any extra adhesive to stick the ornament to the bottle
Glass Beads Gel
        As the glass beads gel dries it becomes more transparent. If you are interested in seeing more Glass Beads Gel Projects click these links : Ocean Themed Box, Texture Media Experiments, Altered Heart tutorial 

Christmas Ornament Alteration
And once fully dry [ can take a couple of hours depending on how thick you put the gel] it looks gorgeous !
Glass Beads Gel
I used a snippet of lace to hide the ridges of the glass bottle! Hope you like my altered bottle
Edited : This project was featured on Pixie's Playground
Related Posts Plugin for WordPress, Blogger...