Showing posts with label Cake Card. Show all posts

11.8.16

Stair Step Pop Up Card

Cupcake Pop Up Card 
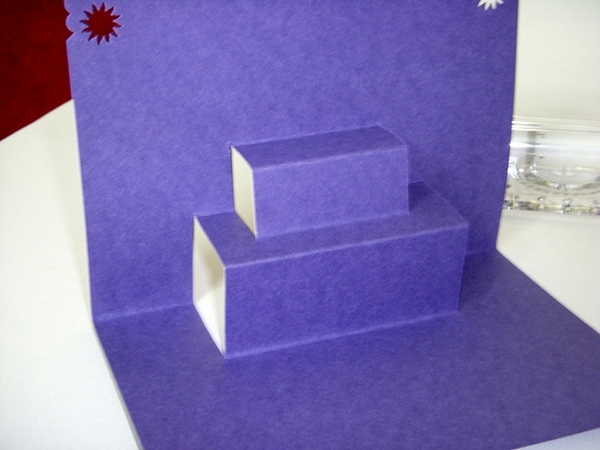
Hi friends....sharing one more Stair Step Pop Up Card ...so in love with this card design...so easy to make and such fun to embellish!

Cupcake Card
 My cupcake was made with a Marianne die and  the embossed icing highlighted with Inka Gold.
Stepper Card
 Red and Gold certainly are very bright colors and perhaps not to everyone's taste but I am hoping the person I send it to likes it!
Stair Step Pop Up Card 
 I added tiny candles on all the steps! I have used quite a few Marianne dies in this card and highlighted the embossing on all the die cuts using Inka Gold!
Pop Up Card 
And here is how the card looks like from above and this one too stands upright and folds absolutely flat to mail
Supplies : Dies : Marianne Just For You  Thanks LR0224, Marianne Creatables LR0319 Petra's small ornament, Marianne Creatables Cupcake LR0160, Marianne Anja Border,Spellbinders Happy Days, Spellbinders  Banner Basics 2,Heartfelt creations Delightful Daisy Die,Couture Creations Scalloped Circles
Linking to  
  1. Marianne Design Divas Challenge - Marianne dies used : Marianne Just For You  Thanks LR0224, Marianne Creatables LR0319 Petra's small ornament, Marianne Creatables Cupcake LR0160, Marianne Anja Border,


26.8.11

Simple Pop Up Cake Card Tutorial

Pop up cake card
A pop up cake is a versatile insert suitable for most cards be it birthdays, anniversaries, and any form of celebration.

Embossed Celebration Card
The pros say you should keep the outside of a pop up card simple ! So only used a paper rose,some plastic butterflies and pearls on this lovely embossed white paper .Since my theme is celebration the embossing reflects party baubles and ribbons. 
Heart Punch Handmade Flower
I made the paper rose using my heart punch and here is the link to the Heart punch Rose Tutorial.
Here is the closeup of the Pop up cake. Its simple to make and fun to embellish
Pop up cake card 
The Felt flower is handmade by using a circle of felt , cutting it in a spiral and rolling  just like you make a spiral paper rose. Only difference from a paper spiral rose is its difficult to hold a felt rose using white glue so I used a glue gun.The shiny metallic green leaves were bought from a local fancy store.
Handmade Felt Flower
This is one of the simplest Pop up Cake cards you can make.Why I like it so much and am sure you would too is that you don't have to use a scale to measure . You dont need a Craft knife and it can be made in a jiffy to beautify any card!

Pop up cake card 
Materials required to make a Simple Pop up cake card
  1. Card stock for base
  2. Card stock for Pop up card Insert:Here I have used half of an A 4 card- You can use thin paper too to make this pop up cake card. Don't use too thick paper as it wont fold well.
  3. Scissors
  4. White Glue
How to make a simple Pop up cake card
Its simple so dont get daunted by the number of photos-- I just posted lots of photos to illustrate each step
Fold your card piece into half
Pop up cake card Tutorial
From the central fold line drop down 2 parallel lines around 2- 2.5cm long [make it as wide as you want].Join the 2 lines. Here you can see my latest toy-- its called a " Roll N Draw" I picked it up from a local stationary shop for 20 Rupees[ quite cheap!]Its a fantastic instrument -quite handy to draw parallel lines, circles,arcs,squares,measure angles!A useful tool for the paper engineer!
Pop up cake card Tutorial
Dont worry about erasing any lines as you are working on the wrong side of your pop up cake card.Cut the parallel lines you drew. 
Pop up cake card Tutorial
Fold the step you have cut in the manner shown
Pop up cake card Tutorial
Open the card and this is how it will look.
Pop up cake card Tutorial
Now reverse your fold by pushing at the central fold from behind and you have the bottom layer of your pop up cake card. 
Pop up cake card tutorial
Close you card.Drop down 2 parallel lines like you did earlier only make them smaller say around 1.5 cm long. Since you are making a cake ,position the lines so as to make the 2nd cake layer at the center of the lower layer.
Pop up cake card Tutorial
Cut only the top layer as shown. 
Pop up cake card tutorial
Fold and reverse your fold like you did earlier .
Pop up cake card Tutorial
Now you have made the 2nd layer of your pop up cake card.Stop there or go ahead and add one more tier to your pop up cake! 
Pop up cake card tutorial
In the similar fashion you can make as many layers for your pop up cake as you want.Only take care to make the length of your drop lines smaller than the previous layer's.
Pop up cake card Tutorial
This is one of the simplest pop up mechanisms and you can build all sorts of scenes on the steps.
Pop up cake card Tutorial
Add candles, flowers, faux icing what not!
Pop up cake card
One more tip I would like to share about making a pop up card is to take care while sticking your pop up to your base card.
Most pop ups look more effective stuck on a base card of contrasting color. Apply glue well to all the corners and edges and position the central crease flush on to the base card central crease. 
Pop up cake card Tutorial
Apply glue on one side at a time as shown.Dont use extra glue as glue seepage can spoil our pop up effect.Apply glue to the other side of the pop up mechanism and fold the base card over on to it.
The golden rules are to apply glue to all edges and corners, apply only a little glue ,test your pop up and then allow enough time for the glue to dry.
Pop up cake card 
Have fun making a simple pop up cake card. And do tell me how you like this celebration card.

Supplies : From Itsy Bitsy : White Embossed Card, Flower Punch,Corner Punch, Alpha Beads to write " Celebrate", Plastic Butterfly embellishments

24.8.11

Quilled Princess Card and Simple Pop up Cake

Quilled Princess Card
Though I do a lot of crafting with my 5 year old daughter I haven't really let her quill much.Recently I thought we would quill together! 
Quilling with kids
We decided to make a Princess in the garden card! Its a kiddy type card and I kept it fairly simple so that my little helper could help to stick the quilled flowers.Here is my Kiddo planning the card.
Quilling with Kids
She has very definite views on how to embellish a card and most of the times her ideas are awesome!
Quilled Princess Card
A tip if you want to let young kids quill- let them make tight coils or the green bottoms of the flowers like we have made here- then the imperfections dont show and it will still look lovely.
Quilled Flowers
 Oh this is my first card with stamping too! Used stamps won in dear blogger friend Jessica's giveaway.
Quilling and Stamping
This is a closeup of our quilled Princess. All little girls love Princesses and mine of course wanted a pink one!When I made the quilled princess I didn't have pink quilling strips so had to hand-cut the strips hence do forgive the imperfections.
Quilled Princess
Here is how we made our quilled Princess. There are a lot of quilling pros out there and I am just sharing  our simple quilled girl for the benefit of the "non-experts"! The face and body are loose coils.We made the skirt with 3 tear drops and added inverted hearts for the border of the quilled girls skirt.
Quilled Princess
To give the skirt volume and an added 3 D effect we added 2 large hearts and a small heart for a 2nd layer.

Quilled Princess
On top of the 2nd layer of the skirt we added a single heart and added pearls to glamorize our Princess's ball gown!
Quilled Princess
The eyes,nose and mouth of our Quilled Princess were drawn with glitter glue.I used tiny bindis for the gems on the crown. For the benefit of my non-Indian readers, bindis are stickers popularly used by Indian women to adorn the forehead and they come in a fantastic range of different sizes and shapes.
Quilled Card
As my blogger friends know I love to add an interactive element. Nothing elaborate this time just a simple pop up cake to celebrate a little Princess's birthday.
Pop up card Birthday Cake
Here is the link to the Tutorial for the pop up cake card .
Pop up card Cake
As always do leave me your comments on what you think about our quilled card and pop up cake.I know it has a lot of imperfections and I almost didnt post it then I thought --let it be! So do be kind!!

Edited: Our Quilled Princess card came in top 3 at Sentimental Sundays

5.8.11

Sliding Cake Card Tutorial


Cake Card

My Magic Sliding Cake card was so popular I still keep getting requests for a tutorial even though its a design I adapted from the Canon site.
Slider Cake Card
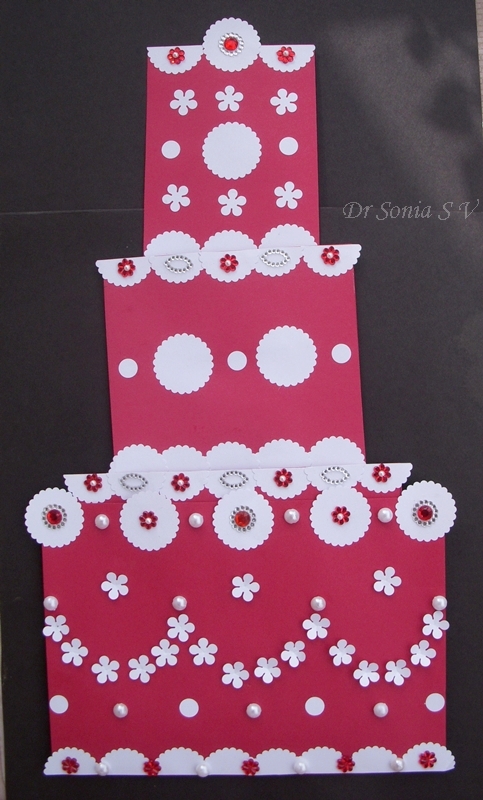
This Magic Sliding Cake card has 4 tiers which slide in and out.

Sliding Cake Card
Hidden slider mechanisms are attached to all 4 tiers of the Cake card and the layers easily slide up and down.
Cake Card
If you want to make that really special card for a special someone this is the one for you!
I hope you don't get daunted by the number of photos as I took more step by step photos just to simplify the slider card mechanism as once you understand it you can easily adapt it to any size or shaped card.
Materials Required For the Slider Cake Card
  • Thick Card Stock
  • Strong Paper to recycle - to make the sleeves of the slider card
  • Scissors
  • Glue-White Glue
  • Double sided Foam tape- makes your life easier but if you don't have it you can make a paper sleeve which will serve  the same purpose.Use the tape of small width.
Slider Cake Card
How to Make the Sliding Cake card. Rather than giving measurements [ I personally don't like to measure!] I will tell you how to design your own slider card so that you can adapt it to whatever size or shape you want.
Decide how many layers you want on your slider card,the size of your card and your are ready to start.
  • Design Your card layers
  • Design your slider mechanism
  • Conceal your slider mechanism
Design your card layers
Sizes and Measurements
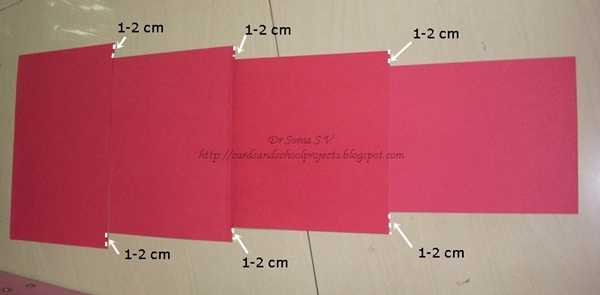
You can make your slider in 2 tiers or more.I made this cake card with 4 layers.Decrease the width of the upper layers by 3-4 cm so that you have enough space on either side of around 1.5 to 2 cm to fit your double sided foam tape or paper sleeve.
Here the lowermost  layer is a folded A 4 card
Here the cards are stacked on top of each other to show you that the height is the same and the width keeps decreasing as you go up by 1-2 cm on each side.
Slider Card Tutorial
Here the cards are stacked on top of each other to show you the width keeps decreasing as you go up by 1-2 cm on each side.
Slider Card Tutorial
If you are someone who doesn't like to design but prefer things ready made here are the measurements I used.For the lowermost layer you can use a folded card or 2 cards[mine is  a folded A 4 of width 21 cm ]. The middle 2 layers are 2 cards each of  17cm and 13 cm width.You need only 1 layer for the top most layer and its 9 cm here
Slider Card Tutorial
Here you can see the decreasing size in the finished slider cake card.
Slider Cake Card
For simplicity I am demonstrating this tutorial with rectangular shaped cake card as its easier to explain but my first slider cake card was shaped trapezium style - just tweak your design accordingly.
Make the slider mechanism 
Use sturdy paper to make your sleeves.The paper should not be too thick but firm .I recycled medication pamphlets  as the sleeves are hidden from view.
Make the long slider sleeves: Length:approximately 2 times the height of your card[ later you can reduce it]. Width: Width will be designed in relation to the upper layer to give a gap of 1.5- 2 cm from the ends[shown in white arrows]
Important tip: the paper edges should be smooth with no jagged edges as otherwise your slider will not work smoothly.
Slider Card Tutorial
Fold over the sleeve as shown leaving a few millimeters gap at the top and around 1.5 cm gap at the bottom
Slider Card tutorial
Place your top layer over the lower card and see if you are happy with the position as this is how it will look once assembled.
Slider Card Tutorial
Now make the short slider sleeves- Take a long strip of paper and slide it under your long sleeve as shown
Slider Card Tutorial
Fold it over to get a loose fit .Cut off the extra overlapping ends.
Slider Card Tutorial
Glue this short sleeve to the lowermost border of your upper layer card
Slider Card Tutorial
This is how the short sleeve will look glued in place
Slider Card Tutorial
Slide the long sleeve under your glued short sleeve as shown.
Slider Card Tutorial
This is how the 2 sleeves look assembled
Slider Card Tutorial
Now flip the top layer over and glue the flaps of the long sleeve to the lower card in the position decided earlier while designing the long sleeve. [Here I have glued it at 1.5 cm above the lower border of the lower layer as I wanted my 2nd layer to stick out at the top by the same 1.5 cm.]
Slider Card Tutorial
Now your slider is ready! Yes that's it actually! You can stop here or make more layers like I did.
This photo shows me adding the slider to the 2nd layer.The topmost layer is already sliding on the 3rd layer!
Slider Card Tutorial
This is the photo of  the sliders of all the layers completed.Here my card has 4 layers and 3 slider mechanism.
Slider Card Tutorial
Now you need to Conceal your slider mechanism.
Add double sided foam tape or paper sleeves to the 2 edges of the card with your long sleeves as shown.
Slider Card Tutorial
Stick the same sized card you had cut earlier.Now you have concealed your long sleeve.Stick double sided tape to the other layers too in the similar fashion.
Tip: If using double sided foam tape run the tape along the whole length uninterrupted as otherwise your sliding mechanism can catch at the edges and not work smoothly.
Slider Card Tutorial
Once you have glued the side edges of your bottom layer with double sided foam tape or paper sleeves your slider card is ready and you can embellish it.
Slider Card Tutorial

You can use a lot of embellishments all over the lowermost layer
Cake Sliding Card
But the upper layers can be embellished only at the upper edges which jut out in the closed position as otherwise your slider will not work well.
Cake Card
You can use this slider card tutorial and adapt the sizes and shapes to make a sliding cake card, a blooming flower card, a Jack in the box emerging card etc - you can adapt it for so many ideas!
Here is the link to my first Slider Cake Card
Have fun and do leave me your comments as that is what keeps me going !
Related Posts Plugin for WordPress, Blogger...