Showing posts with label Step Cards. Show all posts

20.9.17

Fancy Fold Step Card

Fancy Fold Step Card
          Hi friends , are you surprised to see so many posts from me?  I am on a determined spree to use up hoarded craft supplies. Do you have pretty papers that you love too much that you can't bear to use them...? Hehe I am big time guilty of that one and hope some of my friends can relate!!
Fancy Fold Step Card
          I used hoarded fall themed papers not only on the base of my card but to also make the embellishments like the die cut tree, the punched flowers and  the tea cup! I die cut the Memory Box tree twice and layered them offsetting a bit to give extra volume and depth and added some cute resin flower embellishments[ which again I loved too much that I have hung on to them for years!!]
Handmade Paper Flower
        The  Magnolia was made with a Spellbinders die and a subtle shimmer added using a special glitter called Crystal Clear. This beautiful glitter[available in India and also sold by the Heartfelt creations, USA] is made by my talented friend  Rajni Chawla   and she was so kind to send it to me to try out.Thank you so much Rajni!
Fancy Fold Step Card
I added rhinestone swirls above my tea cup and a shiny chocolate disc on the saucer!
Fancy Fold Step Card
Here is the side view showing classic fall elements on each step : acorns, a pumpkin, a lazy cat and fall leaves!
Fancy Fold Step Card
Have a good day!!
Supplies : Dies :  Memory Box Arboscello Tree, Memory Box Rounded Fence,Elizabeth Craft Designs Teacup , Cheery Lynn  Flourish 13,Cheery Lynn  grass,  Spellbinders Magnolia,Spellbinders Happy Days,
Punches : Martha Stewart , Jef daisy
Papers : Debbie Mumm Harvest and Holiday

17.3.17

Handmade Flowers on a Step Pop Up Card

Handmade Flowers on Pop Up Card 
Hi friends sharing a Step Pop Up Card with handmade roses and magnolias made with Spellbinder dies.
I love the  green- peach pink color combo and for once this card came together easily though a lot of work was involved in making the handmade blooms!
Handmade Flowers on Pop Up Card 
 I used a scrap piece of paper having a cute cupid to make a heart shaker card topper! Love the little clay hearts from Dress my Craft which I added inside and atop the heart shaker [ Crafters Corner]
Shaker Card topper
 The flowers were made from thick card stock, inked with Distress Inks  and jazzed up with Sparkling Dust glitter powder. Here is the Tutorial on how to make the roses : Handmade Rose Tutorial 
Handmade Flowers on Pop Up Card 
 I love playing with dies and added a castle, magic wand and chariot on one side of the Pop Up Card .
Foam Castle
 Used the Spellbinders Pretty Princess die to cut them from designer foam.
One corner has another Magnolia flower,a ribbon rose and a green die cut banner with cute tiny white hearts!
Handmade Magnolia using Spellbinders Magnolia Die
 The ribbon roses were a pale pink in color and I matched them to go with the rest of my card using Distress Inks  !
Shaker Card Element
 The pattern paper background was toned down using white acrylic paint and Carabelle Studio Geometrie 1 stencil and helped add to the Shabby Chic look!
Pop Up Card 

I hope you liked this Pop Up Card with handmade flowers galore.

Supplies : Dies :   Spellbinders Rose Creations  , Spellbinders Magnolia,Spellbinders Happy Days,Spellbinders Pretty Princess,Spellbinders Lace Hearts,Spellbinders Delicate Doilies
Sizzix Framelits Hearts,Sizix  Floral Wreath
Cheery Lynn  Flourish 13, Cheery Lynn Colonial Lamp Post

Couture Creations Bijoux
Itsy Bitsy Thin Cut Dies Word Banners
Papers : Bob n Betty
Stencils : Carabelle Studio Geometrie 1

10.10.16

Woodland Step Pop Up Card

Woodland Step Pop Up Card 
          Hi friends...for those of you who have been following my blog for some time... yes I am back to my old style of cards....Yes feels good to create a fancy fold Pop Up Card with lots and lots of die cuts, 3 d stamped elements and details galore!!
          I made the background of my woodland card by randomly stamping pine leaves from a Winnie and Walter In Bloom Elsa's Flora Stamp Set  on a DCWV paper.
          Added lots of golden heat embossed and water-colored strawberries with their lovely vines and leaves [from Heartfelt creations]---yes they did take a lot of time to make but I think it was worth it!
Coffee Pop Up Card 
        I made the coffee cup by free hand drawing a cup and using a Marianne cup cake die to for the cream and a Spellbinders majestic labels 25 die cut to form the cup sleeve. I embossed the cream using a swirl embossing folder and gave a light sponging with Distress Inks  to make a Cappuccino !
Coffee Cup
       My woodland has a little birdie with her nest full of eggs. I am so lucky that in my home we have a couple of nests and happy mamma birds and babies who get food and water galore as my digs let them all eat and drink from their doggy dishes! Don't know if my doggies are just plain lazy or true animal lovers!!Hehe
Bird and Nest Pop Up Card 
          And the star of my woodland is my little hedgehog. I have always been fascinated by these creatures from childhood stories and was so thrilled to read that my blogger pal Di of Pixie's Snippets Playground  often has hedgehogs visiting her home!! In case you didn't know Di hosts the most wonderful Challenge on her blog and not only does she have amazing prizes but her site is a warm fuzzy place where friendships are encouraged and made!
Hedgehog Pop Up Card 
          I die cut Winnie and Walter Cheers Cutaway in gold and layered it over 2 more layers to create a beautiful 3 D sentiment. The little red hearts scattered all over my Pop Up Card are also from Winnie and Walter  [Essentials Audrey Cutaways set].
Woodland Step Pop Up Card 
 Not only does my Pop Up Card have strawberries galore  but also tiny woodland creatures on each step of the stair step design!Can you see the little fox, squirrel and little bunny?
Woodland Step Pop Up Card 
I hope you liked this special Pop Up Card  I made for a special new crafty blogger friend of mine!
Woodland Step Pop Up Card 
Supplies : Dies :  Winnie and Walter Cheers Cutaway , Hearts from Winnie and Walter  Essentials Audrey Cutaways ,Stair Step Card base made with Spellbinders Happy Days,Marianne Fence Bird House, Marianne Designs Hedgehog,Marianne Creatables Cupcake LR0160, Marianne Anja Border ,Cheery Lynn Grass Border, Memory Box Delicate Nest,Coffee Cup sleeve made with Spellbinders Majestic Labels 25,Heartfelt creations Berry Blossoms Die
Stamps : Winnie and Walter In Bloom Elsa's Flora Stamp Set,Heartfelt creations Blooming Berries Stamp

1.10.16

Coffee Stair Step Card

Coffee Stair Step Card
 Hi friends....sharing my last card for the Fall Coffee Lover's Blog Hop. I used a favorite design...the stair step card made using the Spellbinders Happy die.
Coffee Stair Step Card
 I made the creamy coffee cup by used the "icing" from a Marianne Cupcake set a freehand drawn glass and  a Spellbinders die cut to make the sleeve of my coffee cup! The bourbon biscuit was made using air-drying clay and a Plaid mold.
Coffee Cup
My card has a lot of cheerful yellow and orange!
Coffee Stair Step Card
 The "Thanks" was made using a Winnie and Walter die cut and all the leaves on this fall card were made using stamps from Winnie and Walter In Bloom Elsa's Flora Stamp Set and embossed using WOW Metallic Gold sparkle embossing powder.
Coffee Stair Step Card
 In this view you can see all the cute little woodland creatures I added to each step...there is a squirrel , a fox, a rabbit and an eagle.
Coffee Stair Step Card
 The best thing about this card design is it folds flat and can be mailed!
Coffee Stair Step Card
Supplies : Dies : Winnie and Walter In a Word Thanks Cutaway,Sizzix Embosslit Lacy Heart,Marianne Creatables Cupcake LR0160,Marianne Anja Border,Spellbinders Majestic Labels 25,Spellbinders Happy Days ,Provocraft Natural and Texture Border,Cuttlebug Animal Crackers,Spellbinders  Borderabilities Eyelets Border,Sizzix BigZ Tim Holtz Tattered Florals
Pattern Paper : Debbie Mumm Harvest and Holiday
Stamps : Winnie and Walter In Bloom Elsa's Flora Stamp Set 
Simon Says Work it Wednesday

28.6.16

Garden Center Step Card

 Center Step Card
        Hi friends though I  love making fancy fold cards this is my first attempt at a center step card  and though technically the card was easy  [I followed Joann's tutorial ], my mojo was at a low and boy did I struggle to embellish it ...my mind visualised something but my hands created something entirely different...if you know what I mean!
          And on more than one instance I was tempted to dump it all in the  dustbin!
 Center Step Card
         Made the central panel with a crackle stamp , sprays , Distress Inks  and stencilling with inka gold. The sparkling golden leaves were heat embossed using the Winnie and Walter In Bloom Elsa's Flora Stamp Set and the flower was made using Heartfelt creations stamps and dies.
 Center Step Card
The little bird and nest were made using lightweight air drying clay and molds
 Center Step Card
          The heart is from the  Winnie and Walter True stamp set- it was heat embossed in white and colored with Distress Inks.I smeared Inka Gold on the heart  and on random areas on the crackle background to give a golden sparkle.
         The two butterflies on the top sparkle as they were stamped on an  "Alcohol inks swirled" metallic card stock
 Center Step Card
          While I was making this card, my in house critique , my 10 yr old daughter ,told me bluntly that the side panels and the centre looked rather disconnected!Well I had to agree with her and I added pink ribbon roses and a twirling pink pearl string  across the central panel and side panels to try and bring about a coherence though am not sure how much I have succeeded!
What do you think my friends?
 Center Step Card

Supplies : Dies :  PoppyStamps swirly curl border , Poppy Stamps Weeping Willow Branches  ,Winnie and Walter  Essentials Audrey Cutaways, Spellbinders Shapeabilities Persian Accents , Heartfelt Creations Botanical Wings die, Sizzix Hero Arts Die- Stamp Set 657773
Stamps : Winnie and Walter True , Winnie and Walter In Bloom Elsa's Flora Stamp Set ,Sizzix Hero Arts Die- Stamp Set 657773 , Crafty Individuals 213,Heartfelt Creations Botanical Rose Stamp 
Misc Products : Whipped Spackle, Inka Gold, Alcohol Inks, Distress Inks  
Linking to 

8.1.16

Fancy Fold Step Card

Fancy Fold Step Card
        I love how our blogger friends can inspire us to challenge our creativity.My friend Alice known to many of you as Scrapamondo has recently been sharing lovely step Pop Up Cards...she made them using a die but since none of the sellers in India sell that particular die, I played around with some measurements and hand cut and folded away to create my version of a Fancy Fold Step Card.
Glitter Foam "Happy"
 I used my new Marianne Lily and Forget me not flower dies as  stencils to ink the die cuts to create the blue- white flowers. The Happy is a glitter foam die cut[ Winnie and Walter]
Step Pop Up Card 
Blue- white and a dash of green look good together doesnt it!
Pop Up Card 
The center panel has Tattered lace flowers with foam putty centers[foam putty was borrowed from my kiddo without letting her know!!]. The leaves you see on all my panels are stamped, die cut Heartfelt creations leaves.
Parchment Flowers
My last panel has parchment flowers heat embossed in white with tiny blue forget me not flower branches and a delicate yellow butterfly!
Fancy Fold Card
Here is how the card folds flat for mailing.
I hope you liked my new year card made with tons of new supplies I got during a recent shopping spree at my friend Priya's shop
I dont have a tutorial for my card  as it was just an experiment which turned out right but the talented Selma has a useful template for the 5 step part.

Supplies : Dies :  Winnie and Walter Happy Cutaway, Elizabeth Craft Designs Happy New Year,Spellbinders Donna's Alphas, Tattered Lace Lacy Rose,
Memory Box Precious Hearts,Memory Box Pippi Butterfly,Memory Box Rounded Fence ,Heartfelt creations  Sun kissed fleur ,Heartfelt creations Botanical Wings ,Marianne Designs Anja Leaf 3,Marianne Designs Anja Leaf 1,Marianne Craftables Tiny's forget me nots CR1307, Marianne Craftables Tiny's Lily CR1306, 
Stamps : Heartfelt creations Botanical Wings, Heartfelt creations  Sun kissed fleur
Papers : DCWV
Edited : This card was featured by Di at her Pixie's Playground...Thank you so much Di !

25.11.14

Easy Paper Rose Tutorial

easy flower tutorial
Paper Rose tutorial 
Hi friends Thank you so much for all the appreciation you showered on my Sospeso Transparente Bouquet tutorial ..I was thrilled to know I had introduced a new craft to many of my readers! Sharing a simple side step card with an embossed "Thank you" and handmade paper roses.
paper flower tutorial
Paper Rose tutorial
           Many of you liked the roses in the Decoupaged Stationary set and wanted me to share a tutorial so made another project with the same type of roses though they didn't turn out quite as beautiful even though both were made using the same technique -----well that's handmade isn't it...wows sometimes and is "so so"  at other times!
paper rose tutorial
Paper Rose tutorial
         Roses are one of the most difficult paper flowers to make and I have shared a couple of tutorials earlier on how to make roses with Punches [see thumbnails at end of this post]. The peach pink roses and buds in this card and all the roses in the projects below were made with the Spellbinders Rose creations die.

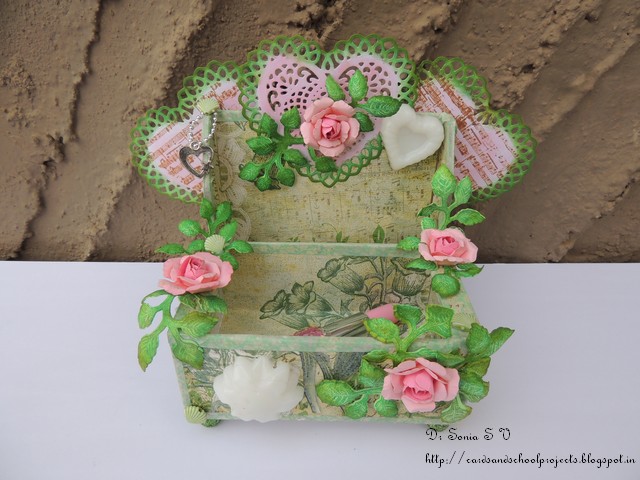
Altered Tin can - with a 3 D decoupaged fairy and handmade roses
easy rose tutorial
Paper rose tutorial 
Decoupaged Pen Stand - check out the link for tips on how to decoupage on plastic.
rose flower tutorial
Rose Flower tutorial 
Handmade Photoframe - a DIY photoframe made by recycling a desktop calendar and adding lots of paper roses!
flower making tutorial
Handmade Rose tutorial 
"Hot glue" Embellishment tutorial  - this post also has a tutorial on how to make your own "Faux Porcelain" embellishments at home using hot glue!
flower making tutorial
Rose flower tutorial 

How to make Paper Roses

Gabriella Pollaco has a beautiful tutorial on how to make roses with the Spellbinders die....but I have struggled in making the conical center as well as shaping the petals of the paper rose as my hands are not as nimble as hers!!
Sharing a method I sort of invented and started using recently which makes "rose making" so much easier!

Materials for paper rose making

  1. Ear Buds
  2. Paper Flowers
  3. Ink Pads
  4. Glue
  • Ear buds [Q tips] -- yes you read that right!! In fact I got the idea for this rose after seeing these funny looking ear buds in a local supermarket as it looked just like a rosebud! If you don't get these you can fluff up a regular ear bud and try but if you see these funny shaped ones in your chemist shop or local supermarket...grab them with both hands!!
    rose making tutorial
    Rose flower tutorial 
  • Paper flowers- though I have used the Spellbinders rose creations die, you can use any die cut, punched or hand cut flower [here is a hand-cut flower tutorial]  which can wrap your ear bud within it! I used the 2nd and 3rd largest flowers from the die set as marked by the blue arrows.
Spellbinders tutorial
Spellbinders Rose Creations Die
  • Ink pads- optional- if you want to make 2 tones flowers or ink the edges of your flowers like I did here.You can paint your flowers too but using ink pads is easier and faster.
rose tutorial
Paper Rose tutorial 
  • Glue - I strongly recommend using a hot glue gun unless you  have tons of patience !

Steps to make your Paper Rose

I captured photos of all the steps in making the paper rose and since there were quite a few photos have made a video slideshow of the Paper rose tutorial - Its less than 2 mins so do have a look at it to see all the steps in detail but here are the key points.
  • To make a Rosebud you just need a single flower and a ear- bud! -- Yes  its that easy!
  • You can make a Rose using 2  small and 2 to 3 large flowers
paper rose tutorial
Add caption
  • Inking : This step is completely optional- you can skip it and dive into the rose making!
    • Ink the Ear Bud : Cut the Ear bud in half  and ink its top so that even if a little is visible in your completed flower its camouflaged nicely
    • Completely ink the inner flowers
    • Ink the edges of your outer flowers
paper rosebud tutorial
Paper Rose Tutorial 
Why this  rose making tutorial  so easy is you are using the ear-bud to make the center of your rosebud or rose ! Wrap the petals of your flower around the ear bud and glue as you go! Because the ear bud has a stick, holding the flower while hot gluing it is easy and less likely to give you burns from the hot glue!
I hope I have piqued your interest...so sit back and watch this short video tutorial which is less than 2 mins! [Please do watch in HD to see the written captions clearly]

paper rosebud tutorial
Paper Rose tutorial
You can add a calyx to your rose bud and wrap floral tape or green paper around the ear bud stem to make a floral bouquet for your cards or scrapbooks.
paper rosebud tutorial
Paper Rose Tutorial 
  • If you want a fuller rosebud ..make it with 2 small flowers.
  • If you want to make the rose.....insert the 2 flower- bud into the larger  flower and glue the petals around it!
easy flower tutorial
Paper Rose tutorial

  • You can add more flowers to your rose to make a fuller rose!
Paper roses tutorial
Paper Rose Tutorial 
Other options to use instead of ear buds : bead, cotton ball, Styrofoam/thermocol ball, scrunched up paper ball or clay ball in the center.
handmade roses tutorial
Paper Rose tutorial
I hope you enjoyed my easy rose making tutorial .Do tell me how it is.
Here are links to more tutorials to make your own Paper Roses using Punches.

Pear Petal Rose

Heart Punch Rose

Punchcraft Rose

5 petal Rose

Supplies: Dies : Spellbinders Rose creations die, Heartfelt creations Spellbinders Classic leaf, Spellbinders Shapeabilities Decorative labels 28,Poppy stamps swirly curl,Poppy stamps Meso background , Marianne Anja leaves, Cheery Lynn  butterfly. Embossing folder : Sizzix Thank you,Stamps :  Itsy Bitsy lace stamp, Heartfelt creations leaf
Edited : This card was chosen top winner at Poppy Stamps
Related Posts Plugin for WordPress, Blogger...