Showing posts with label Photoframes. Show all posts

1.12.15

Autumn Flowers Photoframe

Paper Flower tutorial 
    I love making and  altering photo-frames and this frame features simple handmade Paper flowers made using the Spellbinders Rose creations die and glitter balls
Paper Flowers
            The vintage photo is of my husband , his sister and parents on the day he graduated from medical college many years ago!!
Paper Flowers
         The frame base has a deep orange colors . My flowers are a creamish yellow and the petal edges and center inked with a tinge of red. The leaves have several shades of green!
Paper Flowers
The fringed flowers were made using a shiny metallic paper. My husband loves flowers and gardening  so I made this photo-frame especially for him!
Paper Flowers
I hope you like this simple Photoframe with lots of flowers and foliage!
Supplies : Dies : Spellbinders Rose Creations  , Heartfelt creations Classic Leaf
Stamps : Heartfelt creations Leaf
Linking to 
  1. Sparkles Forum Challenge
  2. Simon Says Work It Wednesday Nov
  3. Sweet Stamps Anything But a Card Dec 15

21.10.15

Sun and Sea Photo frame

Handmade Photoframe
       I love making photo-frames by recycling old desktop calendars and have made and gifted so many over the years...they are a big hit with the recipients and so much fun to make too!
Handmade Photo frame
        We are planning a short holiday to the beach soon and I guess that is what made me choose this theme for the Photo-frame. And yes the  photo is of my daughter in the toothless grin stage at 8 months !
Googly eyed Sun
        I cut out the sun image from a Tarot card set I had bought during a phase I was fascinated with the numerology, astrology etc etc! To increase the cuteness quotient I added googly eyes , a pink rhinestone nose and a big smile! The golden backdrop is a Joy Crafts Lace die cut which I added to the sides of the photo-frame too.
Embossed Clouds
        I embossed the clouds and gave them a bit of blue over the edges  and added a blue glittery heart just to up to cuteness!
ShellCraft
 I filled the  tiny bottle with glitter balls and chunky glitter and my daughter really went "ooh so cute" over it !
Rhinestone Palm tree
 I am a sticker girl  cant resist buying cute stickers !Layered the palm tree on a golden island encrusted with diamonds!!
Shell craft
 And that's the closeup of the shop sailing over the waves[ the waves are a chipboard piece I heat embossed in 2 shades of blue]
Ship
The ship had a pirate sign on the flag but I wanted cuteness so hid it with a glitter heart!

Resin Craft Dolphin
 I love this dolphin I created using resin, alcohol ink and a chocolate mold!!
Resin Craft Dolphin
And here is one more view of how the light shines through the little dolphin!
I hope you enjoyed my handmade Photo frame!
Supplies : Dies : Joy crafts Lace border, Memory Box  Cloud , Provocraft net, Couture creations Oval, Lifestyle crafts Circle,
Linking to UnstampabellesBGC 72 

13.11.14

Handmade Photoframe

Handmade Photoframe
Handmade Photoframe
Dear friends ,Thank you so much for the encouraging words on my Tips for a Better Blog post ! I had put in a lot of work on that post and it feels nice that many of you found it useful. Sharing a simple handmade photoframe made by recycling a desktop calendar
Handmade Photoframe
Handmade Photoframe
The paper flowers with the pom pom centers are handmade and here is the link to the Paper Flower tutorial 
Handmade Photoframe
Handmade Photoframe
The butterfly was stamped and heat embossed and then water-colored.These Sizzix butterflies and the Cheery Lynn  butterflies are my favorite! You can see more of these butterflies in my fairy land diorama tutorial 
Handmade Photoframe
Sharing  something which is making me sad
Blogging and sharing crafty tutorials and interacting with my blog readers has always given me such joy in the past  but I am  rather saddened today as I found one of my photoframe tutorials published on a website with all my watermarks erased from the photos. This is the 5th time this sort of thing is happening...writing tutorials takes so much time and effort and it is so disheartening when people simply copy whole posts and post to their websites...so depressing !
Do guide....feeling rather miserable !
Update : I Contacted the admin of the offending website and they have now removed the copied article...that is some consolation!

Supplies : Dies : Spellbinders lace hearts,Spellbinders majestic labels 25, Memory Box rounded fence, Marianne bird, Sizzix Tim Holtz tattered florals, Heartfelt creations leaf,Sizzix butterfly , Cheery Lynn  butterfly, Cheery Lynn  fanciful flourish

23.9.14

Foam Flowers Photoframe

Handmade photoframe
Foam Flowers
            Dear friends Thank you so much for the fantastically warm response you gave to my friend Rupa's Wood grain tutorial ---that is what I like best about blogland- the way we support and encourage each other!
          Sorry I have not been around to visit....I had an extremely busy week last week with a huge patient load and my usually good time management skills went for a big toss.I feel so bad for letting down the Tuesday Throwdown team as I couldnt make my Guest DT project for them this week.
           Sharing a simple Photoframe my daughter and I had made as a Teacher's Day gift. Altered a desktop calendar like in the earlier DIY Photoframes I had shared and this time added foam flowers.
handmade foam flowers
Foam flowers
Made the foam flowers using a favorite Cheery Lynn  Sunflower die using this tutorial : Easy Daisy tutorial . I love using foam to craft as it doesn't crush and this was a special advantage in this photoframe as I didn't have to worry about the flowers getting crushed while the handmade photoframe traveled to school!
handmade foam flowers
Handmade Photoframe
We used chunky glitter on the center of the purple flowers and added Heartfelt creations stamped and die cut leaves. This was a super simple Photoframe churned up in minutes!
You can see similar foam flowers here: Fairyland Diorama tutorial 

Supplies : Dies : Cheery Lynn  Sunflower, Cheery Lynn  Butterfly, Heartfelt creations Leaf, Marianne Fence

15.9.14

Teachers Day Gift -Photoframe

Punchcraft flowers 1
Handmade Photoframe
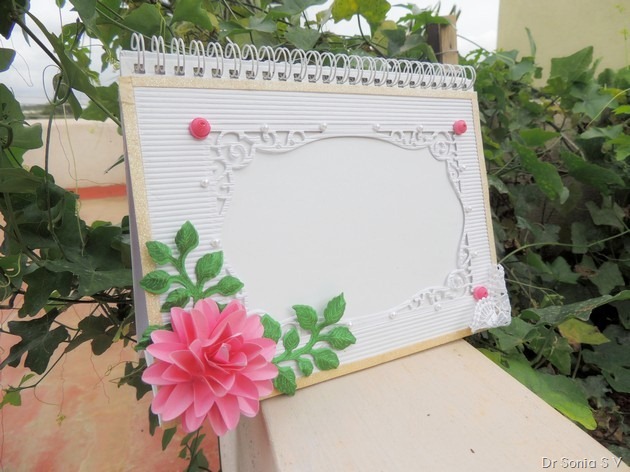
             Dear friends sharing a simple photoframe we made by recycling another desktop calendar for Teacher's day [Tutorials : Photoframe tutorial 1Photoframe tutorial 2Photoframe tutorial 3Easy Picture frame tutorial ].Its a fairly simple frame with just a few die-cuts, a lace fashioned into a heart and some quilling.
Punchcraft flowers 3
Handmade Paper flowers
The large pink flower [made using a Sizzix die and this tutorial : Easy Paper Flower tutorial] was chosen by my kiddo and adding the pink quilled elements on the corners of the frame was also her idea!
Punchcraft flowers 2
Handmade Photoframe
In this post I am also sharing a bit of my crafty happiness with you -the past few days have been super lucky for me in blogland- my  3 D chariot won at the Marianne Dies Challenge, The Roses Photoframe won at Cheery Lynn Dies Challenge, My Fairyland Diorama was top 3 in 4 challenges and my Fairyland Pop up card won at Create something Catchy challenge.
Blogland is also so super encouraging to young crafters and I was so thrilled my daughter's Clay Diorama was top 3 in Brown and Sugar Sea theme challenge and also featured crafter at Anything but a card!
My daughter's Egyptian Mummy was featured at Crafty Gossip Party Ideas and was handpicked winner at A girl who crafts !
And not just the challenge wins and top 3s...I am so thankful that you  my blogger friends leave so many wonderful encouraging comments on every post...So blessed to have such amazing warmhearted blogger pals!
Supplies : Dies : Spellbinders Majestic labels 25,Heartfelt creations Leaf,Sizzix Flower layer 2

7.9.14

Handmade Roses Photoframe

Handmade Photframe 1
Handmade Photoframe
        Dear friends Thank you so much for the sweet comments on the Quilled photoframe my daughter and I  made for teacher's day. Though she wanted to gift 9 teachers this year ,we got time to make only 6 photoframes .This is one of the desktop calendar recycled photoframes we made for this year's teacher's day. 
Handmade Photframe 3
Handmade Paper rose
Made the paper roses and leaves from textured paper using the Spellbinders Rose creations die[Here is the tutorial link : Easy Paper Rose tutorial ] and the diamond vines are bits salvaged from my old dress.The pearly leaves are beads I picked up from a a local fancy store and they are a favorite embellishment of mine! 
Handmade Photframe 2
Handmade Photoframe
I love the texture that corrugated paper lends to any project and corrugated paper is my all time favorite to use in making Photoframes! When I made this one I felt it looked very sophisticated. I actually made this one at night when my daughter was asleep.In the morning my heart sank when kiddo exclaimed that it looked so dull!! Maybe I should have chosen brighter and popular colors since I was gifting to her teacher! What do you think girls ?

Supplies : Dies:Cheery Lynn  Butterfly,Spellbinders Majestic Labels 25, Spellbinders Rose creations,Memory Box rounded fence

4.9.14

Quilled Photoframe Teachers Day Gift

Quilled Photoframe  1
Quilled Photoframe
        Dear friends Thank you so much for the encouraging comments on my first water-coloring attempt in the Baby theme box ! It has really helped to boost my morale !! Every year my daughter and I sit down to make something for her teachers for Teachers day which is celebrated on Sept 5 in India. Last year I was quite overwhelmed as I made more than 10 CD case notebooks and got thoroughly stressed! So this year for teachers day,undertook an easier craft- handmade photoframes !We recycled desktop calendars into easy DIY photoframes [see tutorials : Photoframe tutorial 1Photoframe tutorial 2Photoframe tutorial 3Easy Picture frame tutorial ].
Quilled Photoframe  4
Quilled flowers
          My little girl played an active role in making this particular one. The original base was a dull blue and none of our flowers and embellishments seemed to match it so I gave my ink pad to my kiddo and she randomly inked the blue corrugated paper frame base with purple!I had made these quilled flower buds some time back so just adding some pollens and stamped leaves helped us to quickly make our photoframe.
Quilled Photoframe  5
Quilled Photoframe
For a dash of white to balance all the pink and purple added some lacey hearts with a few pearls to notch up the oomph factor!
Quilled Photoframe  6
Foam roses
The pink roses are made from foam [ you all know how much I adore foam!!] and the leaves are cut from glittery card using the Cheery Lynn  flourish leaf die.The stem is a diamond chain salvaged from a dress[ you  have seen it in Sunflower layout and Fairyland diorama and will be seeing more if it till I strip the whole chain from my dress!! LOL ]
Quilled Photoframe  3
Quilled Photoframe
The pink flower was made my layering several flower layers like in this easy paper flower tutorial 
Quilled Photoframe  2
Quilled Photoframe
           In this side view you can see the photoframe standing on its own. What I have seen is that though we crafters can admire and drool over cards like crazy, non-crafters seems to appreciate gifts with a bit of utility function like a photoframe, a post it note holder etc much more  than cards ! ......Please do share  your experience about this ? 

Supplies- Dies : Heartfelt creations leaf, Marianne fence, Spellbinders lace hearts,Itsy Bitsy scallop daisy, Cheery Lynn  flourish leaf strip, Cheery Lynn butterfly,Sizzix flower layer 2.Stamps: Heartfelt creations leaf
Linking to  Reves 2 scrap Sep[ color combo],Crafting by designs Sep,Emerald Fairies 59 Sep [Springtime]

8.5.14

How to make an Easy Picture frame

Picture frame tutorial  3
Picture frame tutorial
         Dear friends sharing an easy picture frame tutorial to make a unique 3 D frame to house “works of art”.This is a picture of the Egyptian Pharaoh King Tutankhamen coloured by my daughter with sketch pens and watercolours.
        My daughter will turn 8 at the end of this month and being rather enamoured of the “monster- high” dolls ,she wanted a monster high themed party.I must admit I can't stand the ghoulish looking dolls and cringed. Fortunately one of her dolls is “Cleo de nile” and so we managed to reach an agreement and have an “Egyptian theme” Birthday party instead.
Picture frame tutorial  2
Picture frame tutorial
          The whole week my little girl and I  have been brainstorming about Egypt themed party ideas.When I printed King Tutankhamen’s picture from Colorkiddo  I never expected my little one would paint it so beautifully!
She used a shimmery gold water colour paint  for the gold on King Tutankhamen’s face!! She was so proud of it I just had to get it framed .
        Life is so hectic right now that I can't spare the time to go to a professional place to get it framed so I decided to make my own picture frame. I have made lots of handmade photo frames earlier and here are some of the tutorial links [Photo-frame tutorial 1,Photo-frame tutorial 2,Photo-frame tutorial 3]
          I didnt want to embellish the frame for this picture but didnt want a flat frame either.Luckily the Craft Gods were shining on me and my experimentation proved successful

3 D Picture frame tutorial

Materials Required

  • Double sided foam tape – 1 inch would be the easiest width to work with
  • Corrugated paper- different qualities of corrugated paper are available.The sturdier ones would be best to make the 3 D picture frame.Instead of corrugated paper you could also use foam sheets or textured card stock but corrugated paper is the easiest as its flexible and will take a bit of squishing!!
  • Cardboard or other base- I recycled a sturdy piece of cardboard to make the base of this DIY picture frame
  • OHP transparency / Acetate – optional if you want to give a protective cover from dust.

Here is how to make the 3 D Picture frame border

We cut out the painting and stuck it on corrugated glittery gold paper with foam tape for added dimension.
I stuck the corrugated paper with the painting on a sturdy cardboard base[ recycled!] and stuck 1 inch double sided foam tape all along the borders.
Picture frame tutorial  4
Picture frame tutorial
I cut out corrugated paper to make the border frame the same length as the tape on one side of the picture but of width 2 and 1/4 inch. If you are using a different width of foam tape just double the width plus add a bit extra to get the width of corrugated paper to use.
Picture frame tutorial  5
Picture frame tutorial
Stick the “right side” of the  corrugated paper on the inner half of the tape only. Press firmly using your fingers.
Picture frame tutorial  6
Picture frame tutorial
Roll the corrugated paper like you were making a cylinder into the middle of the foam tape
Picture frame tutorial  7
Picture frame tutorial
Stick the edge of the corrugated paper on the middle of the sticky foam tape
Picture frame tutorial  8
Picture frame tutorial
Now press firmly on the outer part of your corrugated paper so that it sticks firmly to your foam tape
Picture frame tutorial  9
Picture frame tutorial
Corrugated paper takes a bit of squishing without getting squashed!!Make half cylinder tubes for all 4 sides and you have a  beautiful  3 D picture frame
Picture frame tutorial  1
DIY  3 D Picture frame 
          You can leave the ends of the cylinders open or glue semicircles cut out of corrugated paper to cover them like I have done here in the picture frame.
Optional step- Insert a transparency[acetate sheet] over the picture wedged between the 4 frame borders to protect your picture from dust.
         I hope this easy Picture frame tutorial will come in handy to frame a picture or even an image in card making or to create a 3 D frame for a photo in a layout.
Do tell me how you liked my kiddo's art and the frame tutorial .
Here are more links to what we made for our Egypt theme Birthday Party


Edited : This project got an honorable mention at Crafters Corner "special" theme

11.4.13

Foam Flower Tutorial - Cala Lily

Handmade Photoframe
Dear friends thank you so much for the wonderful sweet comments on my previous post of handmade foam flowers.The foam cala lilies were so easy to make that I whipped up some more and added them to a handmade photoframe
Handmade Foam flowers
Added Marianne die cut leaves and pink punchcraft roses to mellow out the purple Cala lilies.[The gorgeous white flowers are a gift from blogger friend Jovi]
I feel so happy when I get requests for tutorials and extremely thrilled when one of my tutorials is appreciated or put to use !!
Here is the  Cala Lily foam flowers tutorial
Materials required
Foam-you can get foam sheets in A 4 or large chart paper size sheets and in different thickness.I found that cala lilies are best made with the thinner type of foam sheet.
To cut the Foam :use scissors, dies or foam punches .
To make the Cala Lily Petal : Cut foam into rough hearts.If you are hand cutting  the hearts dont obsess about getting a perfect heart shape as it doesnt really matter for the final appearance of your foam flower
Foam flower tutorial
To make the Cala Lily Center : I used Amos playdough as it dries without cracking and is super lightweight so ideal for paper crafting. You can also experiment with a paper mache type roll, paper rolled on a tooth pick or even a ear bud[Q tip] dipped in paint like I did in this post :Pop up card tutorial [yes you read right..I did use a slim ear bud for those paper cala lilies!! We ENT surgeons dont recommend using ear buds in the ear but I had some lying around so crafted with them!!]
I got the idea for the heart shape and the play dough center from some pins I had pinned here : Flower Making tutorials.
To make the Cala Lily Stem - use floral wire/other wire you have ; tooth picks, skewers, ear buds , paper rolls or even a used ball point pen refill![More recycling ideas welcome!]
To Glue it all together- If you are the patient sort use white glue[Fevicol]Otherwise ..I found the hot glue gun the quickest and easiest option for making these cala lily foam flowers.
Foam flower tutorial
Roll a pea sized ball of playdough  into a tapered rod and insert thin floral wire nearly to the center of the rod.Place it on the center of your inverted foam heart and apply a dot of hot glue on the playdough right at the base as shown in the photo of the foam flower tutorial
Foam flower tutorial
Fold over one half of your petal. Apply another dot of glue at its base as shown and fold over the other half. If you are happy with this shape then your cala lily is ready otherwise fold over the top edges of the cala lily and optionally add a teeny bit of glue to hold in place. [I found some flowers retained the fold even without any gluing!]
Sharing how I made some easy leaves you can add to any project.
Leaf tutorial
Die cut,Punch [caution: punches and glitter paper usually dont get along] or Freehand cut leaves .I freehand cut some leaves from Itsy Bitsy Glitter card stock
Leaf tutorial
Place floral wire on the base of the leaf ,apply glue and stick waxed floral tape over it.Roll the floral tape on the wire to make a leaf and branch or add it to your foam cala lily flower.
Cala Lily tutorial
I can be crazy stingy at times and try to save the weirdest of stuff...the above photos show how I saved floral tape[Not because they are expensive...I just love floral tape too much to waste it!!] by wrapping my cala lily and leaf wires together and using the leaf's floral tape to make a stem!! Ha Ha do any of you get these crazy drives to save craft supplies....?
The photo shows the Foam Flowers card I had shared earlier along with my handmade photoframe
Handmade Photoframe
The photoframe is an altered old desktop calendar.Most of my readers have seen lots of examples of my recycling handmade photoframes but for my new readers here are DIY photoframe tutorials
The crystal flower on the photoframe is another easy to make handmade flower and here is the tutorial link : Crystal flower tutorial
Handmade Crystal flower
I made a collage for my pinterest readers to easily pin the Cala Lily foam flower tutorial.
Foam flower tutorial
I am again so grateful to my readers and blogger friends for the loving and supportive comments you write.I hope you enjoyed this handmade foam flower tutorial.
Foam Flowers
Supplies: Dies: Marianne Anja Leaves- Priya. White flowers : Gift from Jovita,Corrugated card- Mantri mall.Ribbon- Gift from Kalindi. Glitter paper- Itsy Bitsy
I have made flowers from some crazy materials .Here are links to some "non paper" flower tutorials.
Foam rose tutorial
Styrofoam /Thermocol Flower tutorial
Crystal Flowers Tutorial
Playdough/Clay/Mseal/Marzipan Rose tutorial
Spoon flower tutorial
Sponge flower tutorial
Beaded Flower tutorial
Aluminium foil flower tutorial
Salt dough tutorial
Easy No sew ribbon flower tutorial
Related Posts Plugin for WordPress, Blogger...